Delicious Dairy-Free Pesto Recipe – Easy & Flavorful
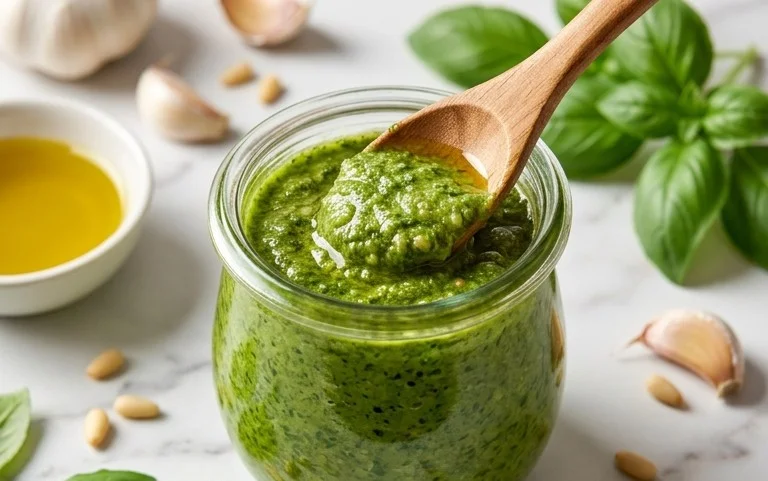
Dairy Free Pesto is a revelation, transforming a beloved classic into a versatile, allergy-friendly delight. For so long, pesto conjured images of creamy, cheesy goodness, a staple in Italian cuisine and a go-to for pasta dishes, dips, and spreads. But what if you’re lactose intolerant, vegan, or simply looking for a lighter, yet equally flavorful alternative? That’s where this incredible dairy free pesto recipe shines. We’re ditching the traditional Parmesan and unlocking a world of vibrant, herbaceous flavor that’s surprisingly rich and satisfying. It’s not just about avoiding dairy; it’s about celebrating the fresh, bright notes of basil, garlic, pine nuts, and olive oil in their purest form. Prepare to elevate your meals with this game-changin extractg, delicious dairy free pesto.
Dairy Free Pesto
Pesto is one of those magical sauces that can transform a simple meal into something truly special. Traditionally, pesto relies on Parmesan cheese for its rich, savory, and slightly salty profile. However, for those of us who are dairy-free or choosing to avoid dairy for other reasons, the thought of missing out on this vibrant green goodness can be a little disheartening. But fear not! This dairy-free pesto recipe is here to save the day, proving that you don’t need cheese to achieve that classic, irresistible pesto flavor.
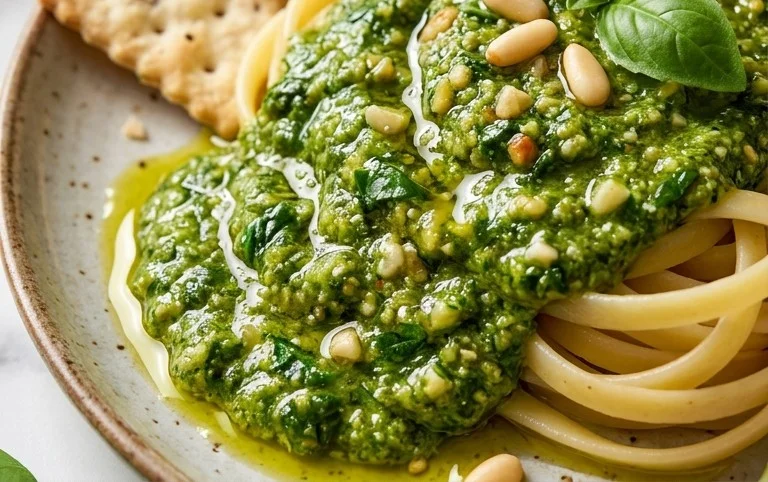
This recipe is incredibly versatile and surprisingly simple to whip up. It’s perfect for tossing with pasta, spreading on sandwiches, dolloping onto roasted vegetables, or even stirring into soups for an extra punch of flavor. The freshness of the basil, the brightness of the lemon, and the nutty undertones come together beautifully, creating a sauce that’s as satisfying as it is healthy. So, let’s get our hands on some fresh ingredients and create some delicious dairy-free pesto!
Ingredients:
Making Your Dairy Free Pesto
This process is wonderfully straightforward. You can use a food processor, a blender, or even a mortar and pestle if you’re feeling traditional and want a bit of a workout. I find a food processor to be the easiest and quickest method for achieving a smooth, consistent pesto texture.
1. Prepare Your Basil: First things first, make sure your basil is clean and dry. I like to give the leaves a gentle wash under cool water and then carefully pat them dry with paper towels or use a salad spinner. Any excess water can dilute the flavor of your pesto and affect its texture. You want the basil to be the star of the show, so ensuring its quality is key. For this recipe, we’re using a generous amount – 3 cups packed – to ensure that vibrant basil flavor is front and center.
2. Toast the Nuts (Optional but Recommended): For an even deeper, more complex flavor, I highly recommend toasting your pine nuts (or your chosen alternative like walnuts or pumpkin seeds). You can do this by placing them in a dry skillet over medium-low heat. Stir them frequently for about 3-5 minutes, or until they are lightly golden and fragrant. Be careful, as nuts can go from perfectly toasted to burnt very quickly! Once toasted, remove them from the skillet and let them cool completely before adding them to your food processor. This step really elevates the nutty notes in the pesto and adds a delightful depth.
3. Combine and Process the Solids: In the bowl of your food processor, add the toasted and cooled pine nuts, the peeled garlic cloves, and the salt. Pulse a few times until these ingredients are roughly chopped. Then, add the packed basil leaves to the food processor. If your food processor is on the smaller side, you might need to add the basil in batches. Don’t worry if it looks a bit crowded; the basil will break down as you process.
4. Introduce the Liquids and Emulsify: Now it’s time to bring it all together. With the food processor running on low speed, slowly drizzle in the extra virgin extract olive oil through the feed tube. You want to stream the oil in gradually, allowing it to emulsify with the other ingredients. This is what creates that smooth, luscious texture that pesto is known for. Continue processing until the mixture is mostly smooth, but still has a little bit of texture to it. Don’t over-process it to the point where it becomes a paste; a little bit of chunkiness is desirable for good pesto.
5. Add the Lemon and Nutritional Yeast (for that cheesy kick!): Next, add the freshly squeezed lemon juice. The lemon juice is crucial for brightening up all the flavors and adding a lovely tang. You can start with the juice of half a lemon and then taste and add more if you prefer a more pronounced citrus note. Finally, if you’re using nutritional yeast, add it now. This is the secret ingredient that mimics the savory, umami flavor of Parmesan cheese without any dairy. Pulse a few more times to fully incorporate the lemon juice and nutritional yeast. Taste your pesto again. Does it need a little more salt? A touch more lemon? Adjust the seasonings to your personal preference. This is where you truly make it your own!
Once everything is combined and the flavors are to your liking, your delicious dairy-free pesto is ready to be enjoyed. Transfer it to an airtight container. It will keep in the refrigerator for about 5-7 days. For longer storage, you can freeze it in ice cube trays and then transfer the frozen pesto cubes to a freezer-safe bag. Enjoy your homemade, dairy-free pesto on everything!
Conclusion:
So there you have it! This dairy free pesto recipe is an absolute game-changer. It’s incredibly easy to whip up, bursting with fresh, vibrant flavor, and it proves that you don’t need traditional cheese to achieve that classic pesto taste. The combination of fresh basil, garlic, pine nuts (or your favorite nut!), and good quality olive oil creates a truly addictive sauce. I love how versatile it is – it instantly elevates pasta, sandwiches, roasted vegetables, and so much more. Don’t be afraid to experiment with different nuts or even add a squeeze of lemon juice for an extra zesty kick. I truly encourage you to give this dairy free pesto a try. You won’t be disappointed, and you might just find yourself reaching for this recipe again and again. It’s a fantastic way to enjoy a beloved classic while catering to dietary needs.
Frequently Asked Questions:
What can I use instead of pine nuts in my dairy free pesto?
Absolutely! If pine nuts aren’t your preference or readily available, feel free to swap them out for other nuts. Walnuts, almonds, or even sunflower seeds make for delicious alternatives. Just toast them lightly for an even richer flavor.
How long does dairy free pesto last?
When stored in an airtight container in the refrigerator, your delicious dairy free pesto should stay fresh for about 5-7 days. To maximize its lifespan and maintain its vibrant color, I recommend pouring a thin layer of olive oil over the top before sealing the container.
Can I freeze dairy free pesto?
Yes, you can! Freezing is a great option if you’ve made a larger batch. Portion it into ice cube trays and freeze until solid. Once frozen, transfer the pesto cubes to a freezer-safe bag or container. This makes it super convenient to thaw just the amount you need for future meals.
Dairy Free Pesto
A vibrant and flavorful dairy-free pesto made with fresh basil, pine nuts, garlic, lemon, and olive oil. Perfect for pasta, sandwiches, and dips.
Ingredients
-
3 cups basil
-
1/2 lemon (juiced)
-
1/2 cup pine nuts
-
2 cloves garlic
-
1/4 cup olive oil
-
1/2 tsp salt
-
2 tbsp nutritional yeast
Instructions
-
Step 1
Combine basil, pine nuts, garlic, lemon juice, and salt in a food processor. -
Step 2
Pulse until coarsely chopped. -
Step 3
With the food processor running, slowly drizzle in the olive oil until the pesto is smooth or reaches your desired consistency. -
Step 4
Add nutritional yeast (if using) and pulse to combine. -
Step 5
Taste and adjust seasoning if necessary. -
Step 6
Transfer to a jar or container and store in the refrigerator.
Important Information
Nutrition Facts (Per Serving)
It is important to consider this information as approximate and not to use it as definitive health advice.
Allergy Information
Please check ingredients for potential allergens and consult a health professional if in doubt.