Buttery Garlic Pizza Recipe- Delicious & Easy
Buttery garlic pizza is the ultimate comfort food, a dish that whispers promises of cozy evenings and pure indulgence. There’s something undeniably magical about the marriage of rich, melted butter and pungent, fragrant garlic, all blanketing a perfectly crisped pizza crust. It’s a simple concept, yet it delivers an explosion of flavor that satisfies on a primal level. What makes this buttery garlic pizza so beloved? It’s the harmonious balance: the richness of the butter isn’t overpowering, and the garlic, when roasted just right, loses its harsh bite and transforms into a sweet, savory symphony. This isn’t just pizza; it’s an experience, a warm embrace for your taste buds, and a guaranteed crowd-pleaser for any occasion. Get ready to fall in love with this buttery garlic pizza all over again.
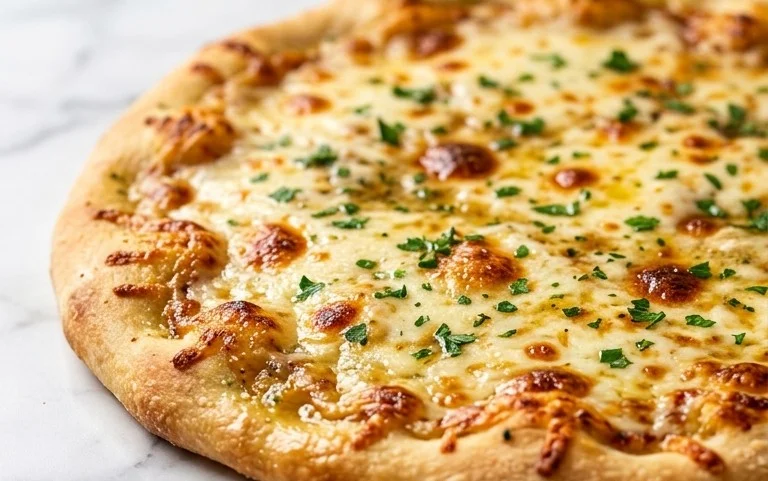
Buttery Garlic Pizza: A Symphony of Flavor
There are pizzas, and then there are experiences. Our Buttery Garlic Pizza falls firmly into the latter category. Forget the heavy tomato sauce; this recipe is all about celebrating the pure, unadulterated goodness of butter, infused with the aromatic punch of garlic and fragrant herbs. It’s the kind of pizza that makes you close your eyes with the first bite, a comforting yet sophisticated treat that’s surprisingly simple to create in your own kitchen. Perfect for a cozy night in, a casual gathering, or whenever you crave something truly special.
Ingredients:
Crafting Your Buttery Garlic Masterpiece: Step-by-Step
Creating this delightful pizza involves a few key stages, from preparing the aromatic butter to achieving that perfect golden-brown crust. Don’t rush the process; each step contributes to the final symphony of flavors.
1. Infuse the Butter: The Foundation of Flavor
Our journey begin extracts with crafting the heart of this pizza: the intensely flavored garlic herb butter. In a small saucepan over low heat, melt the entire stick of salted butter. This is where the magic starts to happen. Once the butter is completely melted and shimmering, add the chopped garlic cloves. We want to gently coax the garlic’s flavor into the butter, not fry it to a crisp. Let the garlic simmer in the butter for about 5-7 minutes, stirring occasionally. You’ll notice the aroma intensifying – that’s the garlic releasing its delicious essence. Be patient; a low and slow approach ensures the garlic infuses deeply without burning, which can turn the flavor bitter. After simmering, stir in the minced rosemary and fresh thyme. These herbs will also release their fragrant oils into the warm butter, creating a truly non-intoxicating aroma. Remove the saucepan from the heat and let the butter mixture steep for another 10 minutes. This allows the herbs and garlic to fully meld and deepen their flavors. The butter will take on a beautiful golden hue and a complex aroma that will make your kitchen smell incredible.
2. Preheat and Prepare Your Workspace
While your garlic herb butter is steeping, it’s time to get your oven and pizza-making station ready. Preheat your oven to its highest setting, ideally 475-500°F (245-260°C). If you have a pizza stone or steel, place it in the oven while it preheats. This will ensure a super-hot surface for your pizza, resulting in a beautifully crisp crust. If you don’t have a stone or steel, a heavy-duty baking sheet will work, but it might not achieve the same level of crispness. Lightly flour a clean surface or a piece of parchment paper – this will be where you stretch out your pizza dough. Having everything prepped and ready makes the assembly process smooth and efficient, especially when working with hot dough.
3. Stretching and Spreading the Aromatic Butter
Now for the star of the show: the pizza dough. If you’ve bought pre-made dough, let it come to room temperature for about 30-60 minutes. This makes it much easier to stretch without snapping back. Gently flour your hands and the dough ball, then begin extract to stretch it out into your desired pizza shape. Aim for a rustic, roughly circular or rectangular shape, depending on your preference. Don’t worry if it’s not perfectly round; that’s part of the charm of artisan pizza. Once you have your dough stretched out, it’s time to generously brush it with your infused garlic herb butter. Make sure to get into all the nooks and crannies. Don’t be shy with the butter; it’s what makes this pizza so incredibly delicious and moist. Ensure an even coating across the entire surface of the dough. You can use a pastry brush for this, or even just a spoon to drizzle it over.
4. Seasoning and Baking to Perfection
With the butter spread, it’s time to add the finishing touches before baking. Sprinkle the dough lightly with flaky salt and freshly ground black pepper. The flaky salt adds a delightful crunch and a burst of pure saltiness that complements the richness of the butter. Then, add a pinch of red pepper flakes to taste. This provides a subtle warmth that cuts through the richness of the butter without overwhelming the other flavors. If you like more heat, feel free to add a little more. Carefully transfer your pizza to the preheated pizza stone, steel, or baking sheet in the oven. Bake for 10-15 minutes, or until the crust is golden brown and puffed up, and the butter is bubbling around the edges. Keep an eye on it, as oven temperatures can vary. The goal is a beautifully crisp exterior with a tender, flavorful interior.
5. Garnishing and Serving Your Buttery Garlic Dream
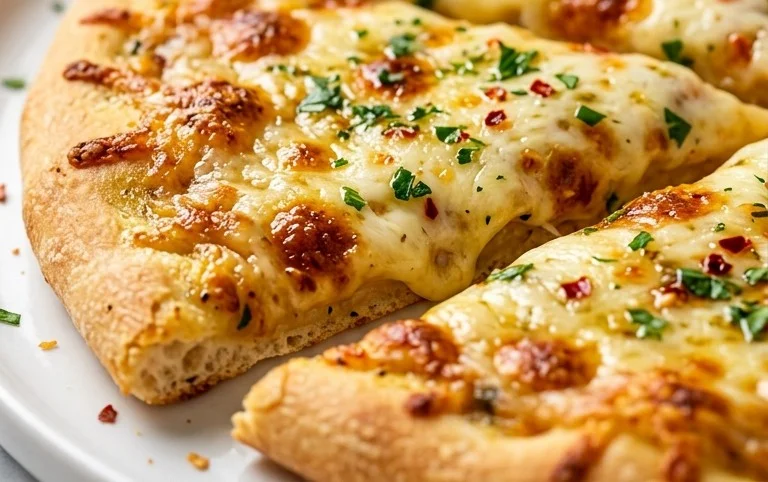
Once your pizza is out of the oven, and while it’s still hot, it’s time for the final, vibrant garnish. Sprinkle the minced chives and the reserved minced green onion over the entire pizza. The fresh, oniony bite of these herbs provides a beautiful contrast to the rich, savory butter and garlic. The residual heat from the pizza will slightly wilt the herbs, releasing their fresh aroma. Let the pizza rest for a minute or two before slicing. This allows the butter and toppings to settle slightly, making it easier to cut and serve. Serve your Buttery Garlic Pizza immediately and prepare for delighted sighs. This pizza is best enjoyed fresh, so gather your loved ones and savor every incredible, buttery, garlicky bite.
Conclusion:
There you have it – your guide to crafting the most delicious and satisfying buttery garlic pizza! This recipe truly shines because of its simplicity, allowing the rich, savory combination of butter and garlic to be the star. It’s incredibly adaptable, making it a go-to for weeknight dinners or a crowd-pleasing appetizer. I encourage you to give this buttery garlic pizza a try; you won’t be disappointed by its comforting flavors and irresistible aroma. The crisp crust, infused with that golden, garlicky goodness, is pure bliss. This recipe is perfect on its own or as a base for your favorite toppings. Imagin extracte it served alongside a fresh, crisp salad or some spicy chicken wings for a truly memorable meal. Don’t hesitate to experiment with different cheeses or herbs – the possibilities are endless!
Frequently Asked Questions:
What are some good serving suggestions for this buttery garlic pizza?
This pizza is incredibly versatile! It’s fantastic served as a main course with a simple green salad. It also makes an amazing appetizer for parties, cut into smaller squares. You could pair it with hearty soups or stews during colder months, or even serve it alongside grilled meats and vegetables in the summer.
Can I add other toppings to this buttery garlic pizza?
Absolutely! While the classic buttery garlic flavor is wonderful, it’s also a perfect canvas for other ingredients. Consider adding mozzarella or parmesan cheese for extra cheesiness, or fresh herbs like parsley or chives for a touch of freshness. Caramelized onions, sautéed mushrooms, or even some finely chopped red pepper flakes can add wonderful depth and complexity.
How can I make this recipe even more garlicky?
If you’re a true garlic lover, you can increase the amount of garlic used. You could also roast the garlic cloves beforehand until they are soft and sweet, then mash them into the butter mixture for an even more intense and nuanced garlic flavor. A drizzle of garlic-infused olive oil just before serving can also amp up the garlicky punch.
Buttery Garlic Pizza
A simple and flavorful pizza featuring a rich garlic butter sauce, fresh herbs, and a hint of spice.
Ingredients
-
2 dough balls artisan pizza dough
-
1 stick salted butter
-
3 garlic cloves, chopped
-
2 tbsp minced green onion
-
1 tbsp minced rosemary
-
1 tbsp fresh thyme
-
flaky salt, to taste
-
freshly ground black pepper, to taste
-
red pepper flakes, to taste
-
2 tbsp minced chives
Instructions
-
Step 1
Preheat your oven and pizza stone (if using) to the highest temperature setting, typically 475-500°F (245-260°C). -
Step 2
In a small saucepan over low heat, melt the salted butter. Add the chopped garlic and cook until fragrant, about 1-2 minutes. Do not let the garlic brown. -
Step 3
Remove the butter mixture from the heat and stir in the minced green onion, minced rosemary, and fresh thyme. Season with flaky salt and freshly ground black pepper. -
Step 4
Stretch or roll out each pizza dough ball to your desired thickness. Place them on parchment paper or a lightly floured pizza peel. -
Step 5
Brush the garlic butter and herb mixture generously over the surface of each pizza dough, leaving a small border for the crust. -
Step 6
Sprinkle with red pepper flakes to your desired level of heat. -
Step 7
Carefully transfer the pizzas to the preheated oven or pizza stone. Bake for 8-12 minutes, or until the crust is golden brown and the cheese (if using, not specified in ingredients) is melted and bubbly. -
Step 8
Remove from oven, sprinkle with minced chives, and slice to serve.
Important Information
Nutrition Facts (Per Serving)
It is important to consider this information as approximate and not to use it as definitive health advice.
Allergy Information
Please check ingredients for potential allergens and consult a health professional if in doubt.