Jalapeno Popper Grilled Cheese-Spicy Creamy Melt
Jalapeño Popper Grilled Cheese is more than just a sandwich; it’s an explosion of flavor that has captured hearts (and taste buds) everywhere. Imagin extracte the creamy, gooey embrace of melted cheese, the satisfying crunch of perfectly toasted bread, and then – BAM! – the delightful kick of spicy jalapeños. This iconic combination is pure comfort food elevated, a symphony of textures and tastes that makes you close your eyes and savor every single bite.
Why do we adore this creation?
It’s the perfect marriage of indulgence and heat. The inherent creaminess of a classic grilled cheese is brilliantly complemented by the zesty punch of jalapeños, creating a balance that’s both exciting and utterly satisfying. What truly makes the Jalapeño Popper Grilled Cheese special is its versatility; it’s equally at home as a weeknight treat or a show-stopping appetizer. Get ready to elevate your grilled cheese game to an entirely new level with this irresistible recipe!

Jalapeño Popper Grilled Cheese
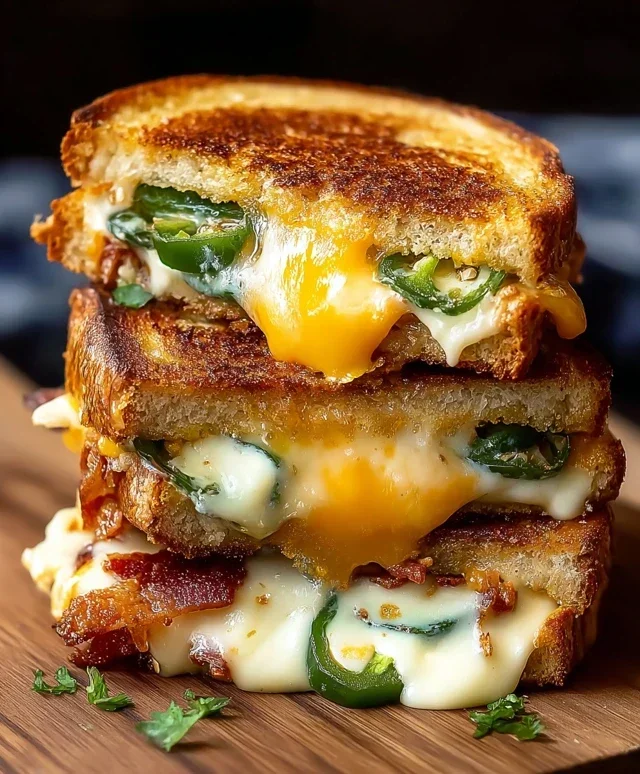
Get ready for a flavor explosion! This Jalapeño Popper Grilled Cheese sandwich takes everything you love about a classic grilled cheese and injects it with the spicy, creamy, and smoky goodness of a jalapeño popper. We’re talking melty cheese, a hint of heat, and that irresistible crunch from crispy beef bacon. It’s the ultimate comfort food, elevated. Forget your bland old grilled cheese; this is a sandwich that demands attention and delivers an unforgettable taste experience.
The beauty of this recipe lies in its simplicity, yet the result is incredibly sophisticated in flavor. It’s the perfect weeknight meal when you’re craving something satisfying and a little bit exciting, or a fantastic option for a weekend brunch or a fun appetizer. The combination of cream cheese, spicy jalapeños, savory beef bacon, and perfectly melted cheeses is truly a match made in culinary heaven.
Ingredients:
Cooking Instructions:
The journey to your perfect Jalapeño Popper Grilled Cheese begin extracts with a little prep work, but trust me, it’s well worth the effort. We’ll be transforming simple ingredients into something truly special.
1. Prepare the Jalapeño Cream Cheese Filling: First, let’s tackle those jalapeños. You’ll want to carefully halve them lengthwise and then scoop out all the seeds and membranes. This is where you control the heat level – the more membrane you remove, the milder your jalapeños will be. For a spicier kick, leave a few of those seeds in! Next, in a small bowl, combine your softened cream cheese with the prepared jalapeños. Now, this is where the magic happens. I like to use a fork to mash the jalapeños into the cream cheese until it’s well combined and you have a lovely, speckled spread. If you’re feeling ambitious and want an extra smooth filling, you could give this a quick pulse in a food processor, but a fork works perfectly well. If you’re using the cilantro, stir it in now for a fresh, herbaceous note that beautifully complements the spice. Set this mixture aside; it’s going to be the star of our sandwich.
2. Assemble the Sandwiches: Now it’s time to build our flavor powerhouses. Lay out your four slices of Italian bread. On two of the slices, generously spread the jalapeño cream cheese mixture you just made. Make sure to get it all the way to the edges for maximum flavor in every bite. Next, we’re going to add our cheese layers. Top the cream cheese spread with the two slices of Monterey Jack cheese, followed by the two slices of sharp cheddar cheese. These cheeses will melt beautifully and create that irresistible gooey pull we all crave in a grilled cheese. On the other two slices of bread, you can either leave them plain as the bottom of your sandwich, or for an extra layer of flavor, you can spread a thin layer of mayonnaise or butter on them as well – your choice! Carefully place the beef bacon over the cheese layers. Break your crispy beef beef bacon slices in half to ensure even distribution and plenty of smoky, salty crunch in every bite. Finally, place the remaining two slices of bread on top to complete your sandwiches.
3. Butter and Grill the Bread: The key to a perfectly golden-brown and crispy exterior on your grilled cheese is the butter. Make sure your butter is softened so it spreads easily. Generously butter one side of each assembled sandwich. This buttered side will be the one that hits the hot pan first, creating that glorious crispy crust. Don’t be shy with the butter; it’s essential for achieving that perfect golden hue and delicious crunch. You want a good, even coating from edge to edge.
4. Cook the Sandwiches – First Side: Heat a large skillet or griddle over medium heat. We want a nice, steady heat – not too high that it burns the bread before the cheese melts, and not too low that it takes forever. Once the skillet is hot, carefully place your buttered sandwiches into the skillet, butter-side down. Let them cook for about 3-5 minutes, or until the bottom slice of bread is a beautiful golden brown and you can see the cheese starting to soften and melt around the edges. Resist the urge to press down too hard with a spatula at this stage; let the heat do the work. You can peek underneath to check the color; you’re looking for that satisfying golden hue.
5. Flip and Finish Cooking: Now for the crucial flip! Using a spatula, carefully flip each sandwich over to the unbuttered side. If you didn’t butter the top slice of bread earlier, now is a good time to add a little more softened butter to the top of the sandwich before placing it in the pan, or butter the now-exposed bottom of the flipped sandwich generously. Let the second side cook for another 3-5 minutes, or until it’s also golden brown and toasted, and the cheeses are completely melted and gooey. You might see some of that delicious jalapeño cream cheese mixture starting to ooze out the sides, which is a very good sign! If the bread is browning too quickly but the cheese isn’t fully melted, you can cover the skillet with a lid for a minute or two to help trap heat and speed up the melting process. The goal is a perfectly toasted bread and gloriously melted, oozing cheese.
Once both sides are beautifully golden and the cheese is a melty marvel, carefully remove your Jalapeño Popper Grilled Cheese sandwiches from the skillet. Let them rest for just a minute before slicing them in half. This allows the cheese to settle slightly, making for a cleaner cut. Serve immediately and prepare for a taste sensation that’s both familiar and excitingly new! Enjoy every spicy, cheesy, beef bacon-y bite.
Conclusion:
There you have it! This Jalapeño Popper Grilled Cheese recipe is an absolute winner. It takes the beloved comfort of a classic grilled cheese and injects it with the zesty, spicy kick of jalapeño poppers. The creamy melted cheese, the subtle heat from the peppers, and the perfectly toasted bread create a symphony of flavors and textures that are simply irresistible. It’s a quick and easy way to elevate your lunch or dinner game, offering a satisfying and flavor-packed meal that feels both familiar and excitingly new. I truly hope you give this recipe a try – I’m confident you’ll be hooked!
For serving, this cheesy delight pairs wonderfully with a cool, crisp salad to balance the heat, or a bowl of tomato soup for a classic duo. Don’t be afraid to experiment with variations! You could add some crispy beef bacon bits for extra savory goodness, or swap out the jalapeños for milder serranos if you prefer a gentler spice. Cream cheese is a fantastic addition to the filling for an even creamier texture. Whatever you choose, the core combination is so delicious, it’s hard to go wrong.
Frequently Asked Questions:
Can I make this Jalapeño Popper Grilled Cheese ahead of time?
While it’s best enjoyed fresh off the griddle for maximum crispness and meltiness, you can prepare the filling (cooked jalapeños and cheese mixture) a day in advance and store it in the refrigerator. This will significantly speed up assembly when you’re ready to grill.
What kind of cheese works best?
A blend of cheeses is usually best for optimal flavor and melt. I recommend a sharp cheddar for its tang and a good melting cheese like Monterey Jack or mozzarella. You can also add a touch of cream cheese to the filling for extra creaminess, which is a staple in actual jalapeño poppers!
Is this recipe very spicy?
The spiciness of this Jalapeño Popper Grilled Cheese depends on the jalapeños themselves and whether you include the seeds. For a milder version, remove the seeds and membranes from the jalapeños before chopping. If you enjoy a good kick, leave them in!
Jalapeño Popper Grilled Cheese
A spicy and creamy grilled cheese sandwich inspired by jalapeño poppers, featuring crispy bacon and melted Monterey Jack and cheddar cheeses on Italian bread.
Ingredients
-
2 jalapeños, halved and seeded
-
4 ounces cream cheese, softened
-
4 slices pork bacon, cooked until crispy
-
2 slices Monterey Jack cheese
-
2 slices sharp cheddar cheese
-
4 slices Italian bread
-
2 tablespoons butter, softened
-
2 tablespoons fresh cilantro, chopped (optional)
Instructions
-
Step 1
In a small bowl, combine the softened cream cheese with the chopped jalapeños and optional cilantro. Mix well. -
Step 2
Butter one side of each slice of Italian bread. -
Step 3
On the unbuttered side of two bread slices, layer one slice of Monterey Jack cheese, then the cream cheese mixture, then the crispy pork bacon, followed by the sharp cheddar cheese. -
Step 4
Top with the remaining two slices of Italian bread, buttered side up. -
Step 5
Heat a non-stick skillet or griddle over medium heat. Place the sandwiches in the skillet. -
Step 6
Grill for 3-5 minutes per side, or until the bread is golden brown and the cheese is melted and gooey. -
Step 7
Remove from skillet, let cool slightly, and slice in half before serving.
Important Information
Nutrition Facts (Per Serving)
It is important to consider this information as approximate and not to use it as definitive health advice.
Allergy Information
Please check ingredients for potential allergens and consult a health professional if in doubt.