Sticky Coconut Cake- Irresistible Tropical Treat
Sticky Coconut Cake is more than just a dessert; it’s a warm hug on a plate, a sweet escape to sun-drenched shores with every tender bite. If you’ve ever dreamt of a cake that’s both incredibly moist and delightfully rich, then this is the recipe for you. What makes this particular Sticky Coconut Cake so utterly irresistible? It’s the magical marriage of creamy coconut milk, the subtle sweetness of shredded coconut, and that glorious, irresistible sticky glaze that cascades down the sides like liquid gold. It’s a symphony of textures and flavors that will have you reaching for a second slice before you’ve even finished the first. This is the kind of cake that becomes a cherished tradition, the centerpiece of celebrations, or simply a perfect excuse to treat yourself to something truly special.
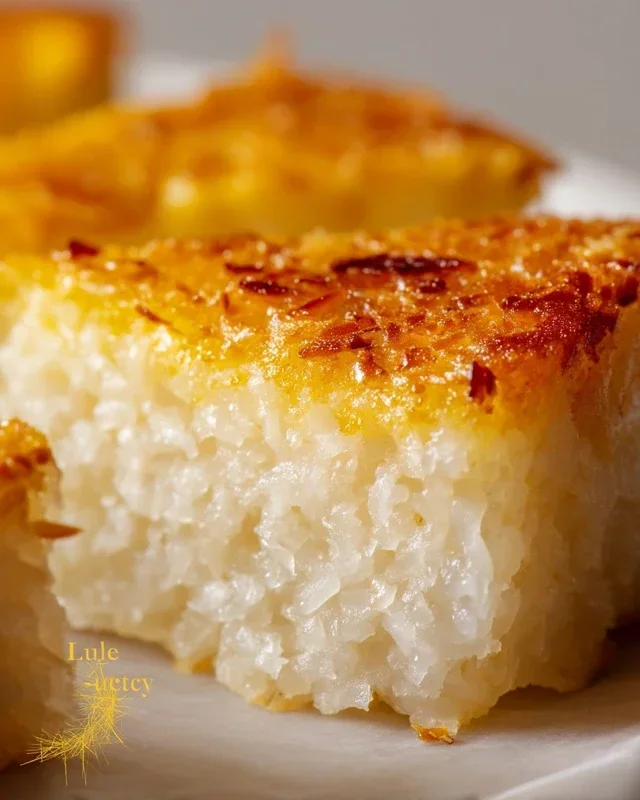
Sticky Coconut Cake
This Sticky Coconut Cake is a delightful treat that’s surprisingly easy to make. It’s a wonderfully moist and tender cake, packed with the rich, tropical flavor of coconut. The texture is wonderfully chewy and dense, almost like a sweet confection, thanks to the glutinous rice flour and the generous amount of coconut milk. It’s perfect for a special occasion, a comforting dessert, or even an afternoon pick-me-up with a cup of tea. The simplicity of the ingredients belies the incredible flavor and satisfying texture you’ll achieve. Get ready to impress yourself and your loved ones with this wonderfully aromatic and delicious cake!
Ingredients:
Getting Started: Preparing Your Cake
Before we dive into the mixing and baking, it’s important to have everything ready. This recipe is quite forgiving, but a little preparation goes a long way. Start by preheating your oven to 350°F (175°C). Grease and flour a 9-inch round cake pan or an 8×8 inch square baking pan. You can also line the bottom with parchment paper for extra assurance against sticking. Ensure your ingredients are at room temperature, especially the eggs, as this will help them incorporate more smoothly into the batter.
Step-by-Step Baking Instructions
1. Whisking the Wet Ingredients: In a large mixing bowl, begin extract by beating the egg yolks with the granulated sugar until the mixture is pnon-alcoholic ale yellow and slightly thickened. This process aerates the yolks and starts to dissolve the sugar, which contributes to a tender cake. Next, gradually pour in the full-fat canned coconut milk, whisking continuously until it’s well combined. Now, add the teaspoon of vanilla extract to this creamy mixture and give it a final stir. This forms the base of our wonderfully moist cake.
2. Incorporating the Coconut and Flour: To the wet ingredients, add the 3 cups of shredded sweetened coconut. Stir this in thoroughly, ensuring every strand of coconut is coated in the liquid. Then, it’s time to add the glutinous rice flour. Gradually add the flour to the bowl, mixing gently until just combined. It’s crucial not to overmix at this stage; overmixing can develop the gluten in the flour, potentially leading to a tougher cake. You want a batter that is thick and rich, with a slightly lumpy appearance from the coconut.
3. Whipping the Egg Whites: In a separate, clean, and dry bowl, beat the 2 egg whites until they form stiff peaks. This means that when you lift the whisk, the egg whites stand up on their own and don’t droop. This step is vital for adding lightness and structure to the cake. Be patient; it can take a few minutes for them to reach the right consistency. Ensure there’s no trace of yolk in the egg whites, as fat will prevent them from whipping properly.
4. Folding the Egg Whites into the Batter: This is a critical step for achieving that perfect texture. Gently fold about one-third of the whipped egg whites into the coconut batter. Use a spatula and a lifting motion, being careful not to deflate the airy egg whites too much. Once partially incorporated, add the remaining egg whites and continue to fold them in until no streaks of white remain. The batter will become lighter and airier at this point. The goal is to distribute the egg whites evenly without overworking the batter.
5. Baking Your Sticky Coconut Cake: Pour the batter evenly into your prepared cake pan. Smooth the top with your spatula. Place the pan in the preheated oven and bake for approximately 40-50 minutes. The baking time can vary depending on your oven, so it’s best to check for doneness. The cake is ready when a toothpick inserted into the center comes out clean or with just a few moist crum extractbs attached. You should also notice the edges pulling away slightly from the sides of the pan, and the top should be a beautiful golden brown with some lovely caramelized bits from the coconut.
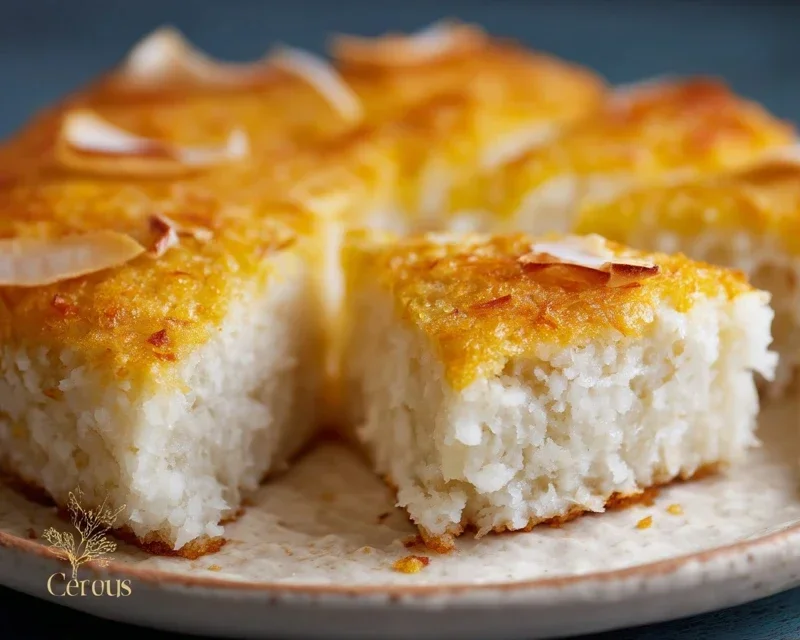
6. Cooling and Serving: Once baked, remove the cake from the oven and let it cool in the pan on a wire rack for about 15-20 minutes. This allows the cake to set further. After this initial cooling period, carefully invert the cake onto the wire rack to cool completely. For an even more decadent experience, you can serve this cake warm. It’s absolutely delicious on its own, but a dusting of powdered sugar or a dollop of whipped cream takes it to the next level. The dense, chewy texture and intense coconut flavor make this a truly memorable dessert. Enjoy every delightful bite!
Conclusion:
I hope you’re as excited as I am to try this Sticky Coconut Cake! This recipe truly is a winner because it delivers a wonderfully moist and tender crum extractb, infused with the rich, tropical essence of coconut. The “sticky” element comes from a simple yet decadent topping that caramelizes beautifully, creating a delightful contrast in textures and flavors. It’s perfect for any occasion, from a casual afternoon tea to a more festive dessert. I find it pairs exceptionally well with a dollop of fresh whipped cream, a scoop of vanilla bean ice cream, or even a tangy passionfruit coulis. Don’t be afraid to get creative with variations! You could easily fold in some toasted shredded coconut into the batter for extra texture, or add a pinch of lime zest to the topping for a zesty twist. I wholeheartedly encourage you to bake this Sticky Coconut Cake; it’s a guaranteed crowd-pleaser that will leave everyone asking for the recipe!
Frequently Asked Questions:
Can I make this cake ahead of time?
Absolutely! This Sticky Coconut Cake is actually even better the next day as the flavors have more time to meld. Store it in an airtight container at room temperature for up to 3 days. If you prefer it slightly warm, you can gently reheat a slice in the microwave for a few seconds.
What kind of coconut should I use?
For the best flavor and texture, I recommend using unsweetened shredded coconut for the cake batter. For the topping, sweetened shredded coconut works wonderfully to achieve that signature sticky, caramelized finish. Ensure your coconut is fresh for optimal results!
How can I store leftover cake?
Leftover Sticky Coconut Cake should be stored in an airtight container at room temperature. It will stay moist and delicious for up to 3 days. Avoid refrigerating if possible, as it can sometimes dry out the cake slightly.
Sticky Coconut Cake
A deliciously sweet and moist cake made with glutinous rice flour and coconut milk, topped with sweet shredded coconut.
Ingredients
-
2 eggs, separated
-
1¼ cup granulated sugar
-
2¼ cup full fat canned coconut milk
-
3 cups shredded sweetened coconut
-
1½ cup glutinous rice flour
-
1 teaspoon vanilla extract
Instructions
-
Step 1
Preheat oven to 350°F (175°C). Grease and flour a 9×13 inch baking pan. -
Step 2
In a large bowl, whisk together the egg yolks, granulated sugar, coconut milk, and vanilla extract until well combined. -
Step 3
Gradually add the glutinous rice flour to the wet ingredients, mixing until a smooth batter forms. Be careful not to overmix. -
Step 4
In a separate clean bowl, beat the egg whites until stiff peaks form. -
Step 5
Gently fold the beaten egg whites into the batter until just incorporated. Do not deflate the egg whites. -
Step 6
Pour the batter into the prepared baking pan and spread evenly. Sprinkle the shredded sweetened coconut evenly over the top of the batter. -
Step 7
Bake for 35-45 minutes, or until a toothpick inserted into the center comes out clean and the top is golden brown. -
Step 8
Let the cake cool completely in the pan before slicing and serving.
Important Information
Nutrition Facts (Per Serving)
It is important to consider this information as approximate and not to use it as definitive health advice.
Allergy Information
Please check ingredients for potential allergens and consult a health professional if in doubt.