Easy Pickled Red Onions- Quick & Delicious Recipe
Pickled red onions are a true game-changer in my kitchen, transforming ordinary meals into something truly special. If you’re like me, you’ve probably encountered these vibrant, tangy jewels and wondered how to recreate that magic. Well, wonder no more! These aren’t just any pickled onions; they’re a burst of sweet, sour, and slightly spicy flavor that adds an instant zing to everything they touch. From tacos and salads to sandwiches and even avocado toast, the humble pickled red onion elevates each bite with its stunning color and unforgettable taste. They’re incredibly easy to make, requiring just a handful of pantry staples and a little bit of patience. The transformation from raw, pungent onion to tender, jewel-toned delight is astonishing, and the payoff is immense. Get ready to fall in love with the versatility and deliciousness of homemade pickled red onions.
Pickled Red Onions
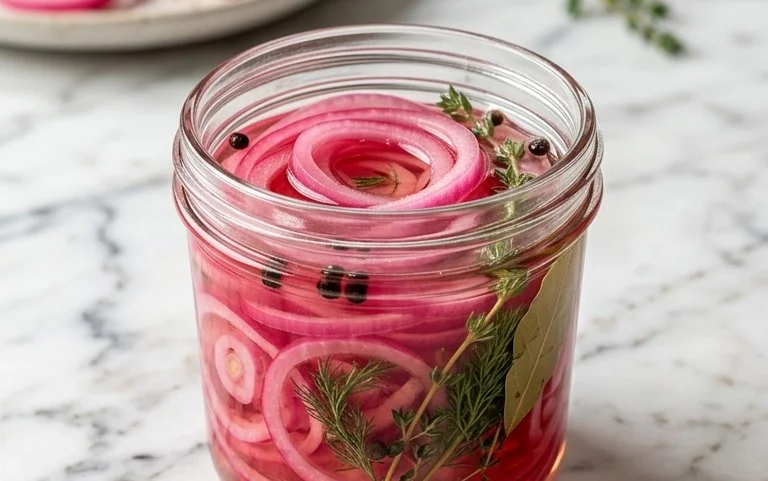
There’s something truly magical about pickled red onions. They transform a humble onion into a vibrant, tangy, and slightly sweet jewel that elevates almost any dish. From tacos and burgers to salads and grain bowls, these bright pink beauties add a burst of flavor and a pop of color that’s simply irresistible. Making them at home is surprisingly easy, requiring minimal ingredients and just a little bit of patience as they pickle. I love having a jar of these on hand in my refrigerator – they’re my secret weapon for adding a gourmet touch to everyday meals.
Ingredients:
Instructions:
Preparing the Onions:
First things first, let’s get our star ingredient ready. You’ll want to peel your large red onion. Trim off the stem end and the root end. Then, slice the onion in half from root to stem. Place each half cut-side down on your cutting board. Now, slice the onion as thinly as possible. I prefer to slice them into half-moons, but you can also cut them into rings if you like. The thinner you slice them, the quicker they’ll pickle and the more tender they’ll become. You can use a sharp knife for this, or if you have a mandoline slicer, that’s a fantastic tool to get perfectly uniform, paper-thin slices. Be careful if using a mandoline – always use the safety guard!
Combining the Brine Ingredients:
While your onions are waiting, it’s time to whip up the pickling brine. In a small saucepan, combine the white vinegar and water. White vinegar is my go-to for this recipe because it has a clean, sharp flavor that complements the onion beautifully. Some people like to use apple cider vinegar for a slightly fruitier note, but white vinegar is classic and reliable. Add the sugar to the saucepan. As I mentioned in the ingredients, you can absolutely adjust the sugar to your liking. If you prefer a purely savory pickle, you can omit it entirely, or if you’re watching your sugar intake, a sugar substitute will work just fine. Finally, add the kosher salt. Kosher salt is preferred here because its larger flakes dissolve well and distribute evenly, but if you only have table salt, you might want to reduce the amount slightly as it’s more concentrated.
Heating the Brine:
Place the saucepan over medium heat on your stovetop. Stir the ingredients gently until the sugar and salt are completely dissolved. You don’t need to boil the mixture vigorously; just bring it to a simmer. The goal here is to dissolve the solids and slightly warm the liquid, which helps the flavors meld together quickly. Once you see small bubbles forming around the edges and the sugar and salt are no longer visible at the bottom of the pan, remove it from the heat. Be patient and make sure everything is dissolved; this ensures an even flavor in your pickled onions.
Assembling the Pickled Onions:
Now for the satisfying part! Take a clean glass jar or a heatproof container. I usually opt for a mason jar with a lid, as it’s perfect for storing them in the refrigerator. Place all of your thinly sliced red onions into the jar. Once the brine has been heated and is no longer at a rolling boil (it should still be quite warm), carefully pour the hot brine over the onions. Make sure the onions are fully submerged in the liquid. If there isn’t quite enough brine to cover them, you can quickly whip up a little extra by adding equal parts vinegar and water and heating it briefly. Gently press down on the onions with a spoon if needed to ensure they are all soaking in the flavorful liquid.
Cooling and Pickling:
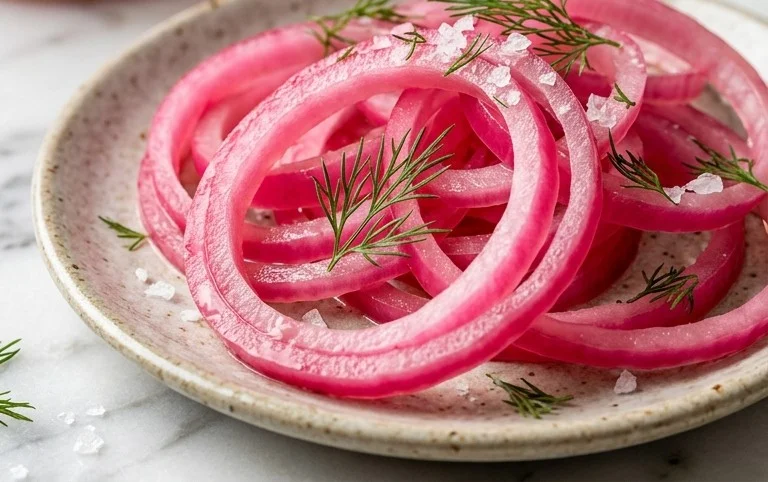
Leave the jar of onions and brine on your counter to cool down to room temperature. This is a crucial step. As the brine cools, it allows the onions to begin extract their pickling process and soften. It also prevents the glass jar from cracking due to sudden temperature changes if you were to put a very hot jar directly into a cool refrigerator. Once the jar is completely cool to the touch, screw on the lid tightly and transfer it to your refrigerator. Now comes the waiting game. While you can technically eat them after about 30 minutes, they truly start to develop their best flavor and texture after at least a couple of hours. For optimal results, I like to let them pickle for at least 24 hours. The longer they sit, the more tender and flavorful they become. They will also turn a beautiful, vibrant pink color, which is such a delightful transformation to witness. You can store these pickled red onions in the refrigerator for up to two weeks, though they rarely last that long in my house!
Conclusion:
And there you have it! Making your own pickled red onions is a surprisingly simple yet incredibly rewarding culinary adventure. These vibrant, tangy gems are far superior to store-bought options, offering a fresh burst of flavor that can elevate countless dishes. The beauty of this recipe lies in its simplicity and versatility. You’ve now got a staple in your refrigerator that can transform ordinary meals into something extraordinary with minimal effort. Don’t be afraid to experiment with serving them on everything from tacos and sandwiches to salads and grilled meats. Their bright acidity cuts through richness and adds a delightful pop of color and taste. I truly encourage you to give this recipe a try; you’ll be amazed at how often you reach for them!
Frequently Asked Questions:
How long do pickled red onions last?
Properly stored in an airtight container in the refrigerator, your pickled red onions should remain delicious for at least 2 to 3 weeks, and often longer. They actually tend to get even better as the flavors meld over time.
Can I use a different type of vinegar?
Absolutely! While apple cider vinegar or red grape juice vinegar are classic choices that complement the onions beautifully, feel free to experiment. White grape juice vinegar or even a simple distilled white vinegar will work, though they might offer a slightly different flavor profile. Some people even like to add a splash of balsamic vinegar for a deeper, sweeter note.
My pickled red onions aren’t bright pink, what did I do wrong?
Don’t worry! The vibrant pink color comes from the interaction of the acidity in the vinegar with the pigments in the red onion. Sometimes, if the onions aren’t sliced thinly enough, or if the brine isn’t hot enough when it initially touches the onions, the color might not be as intense. However, as long as they taste great, the color is purely aesthetic. Over time, they will likely deepen in hue.
Pickled Red Onions
Quick and easy pickled red onions, perfect for tacos, salads, and sandwiches. A tangy and vibrant condiment.
Ingredients
-
1 large Red onion, thinly sliced
-
1 cup White Vinegar
-
1 cup Water
-
1 tablespoon Sugar
-
2 teaspoons Kosher salt
-
1/4 teaspoon Black Peppercorns (optional)
-
1 Bay Leaf (optional)
Instructions
-
Step 1
Thinly slice the red onion into rings or half-moons. -
Step 2
In a medium saucepan, combine the white vinegar, water, sugar, and kosher salt. -
Step 3
Heat the mixture over medium heat, stirring until the sugar and salt are dissolved. Do not boil. -
Step 4
Place the sliced red onions into a clean glass jar. -
Step 5
Pour the warm brine over the onions in the jar, ensuring they are fully submerged. Add peppercorns and bay leaf if using. -
Step 6
Let the jar cool to room temperature, then cover and refrigerate for at least 30 minutes before serving. For best flavor, allow to pickle for a few hours or overnight.
Important Information
Nutrition Facts (Per Serving)
It is important to consider this information as approximate and not to use it as definitive health advice.
Allergy Information
Please check ingredients for potential allergens and consult a health professional if in doubt.