Fruity Pebbles Cheesecake Tacos-Sweet Dessert Bliss
Fruity Pebbles Cheesecake Tacos are here to revolutionize your dessert game! Forget everything you thought you knew about tacos because these aren’t your average savory sensation. We’re talking about a whimsical, wonderfully sweet creation that captures the vibrant, nostalgic essence of your favorite childhood cereal. Imagin extracte a creamy, tangy cheesecake filling, swirled with the colorful magic of Fruity Pebbles, all cradled within a crisp, delicate taco shell. It’s a flavor explosion that brings a playful smile to your face with every bite. People are utterly obsessed with Fruity Pebbles Cheesecake Tacos because they offer an unexpected yet delightful fusion of textures and tastes. The smooth cheesecake is the perfect counterpoint to the crunchy shell, and the fruity cereal adds pops of sweetness and a fun visual appeal. This isn’t just a dessert; it’s an edible work of art that’s sure to be the star of any party or a delightful treat just for you.
Get ready to whip up your own batch of these incredible Fruity Pebbles Cheesecake Tacos!
Let’s dive into the deliciousness!
Fruity Pebbles Cheesecake Tacos
Get ready for a dessert explosion of color and flavor! These Fruity Pebbles Cheesecake Tacos are a playful and utterly delicious way to combine the creamy dreaminess of cheesecake with the crunchy, fruity fun of everyone’s favorite cereal. Imagin extracte a perfectly crisp, taco-shaped shell, a rich and velvety cheesecake filling, and the vibrant sweetness of Fruity Pebbles – it’s a match made in dessert heaven. They’re surprisingly easy to make, making them perfect for a fun weekend project or a show-stopping treat for your next get-together. We’re taking the classic flavors we love and giving them a whimsical, taco-inspired twist that’s guaranteed to bring smiles all around.
Ingredients:
Crafting Your Fruity Pebbles Cheesecake Taco Shells
The foundation of our delightful tacos starts with creating a unique, edible shell. We’re going to transform that beloved fruity cereal into a sturdy, yet delightfully crisp, taco shape. This is where the magic begin extracts, and it’s a lot easier than you might think.
First, we need to prepare our cereal mixture. In a large bowl, combine 3 cups of colorful fruity cereal with the melted unsalted butter. Stir everything together thoroughly until the cereal is evenly coated. You want every single piece of cereal to have a little bit of that buttery goodness. This butter acts as the binder that will hold our cereal together once it’s pressed into shape. Give it a good few minutes of mixing to ensure maximum coverage.
Now, it’s time to shape our tacos! You’ll need a taco mold or a similar shaped mold that can withstand oven heat. If you don’t have a specific taco mold, you can get creative! Consider using oven-safe ramekins or even forming them freehand on a parchment-lined baking sheet, though a mold will give you the most consistent taco shape. Lightly grease your molds to prevent sticking. Spoon the buttered cereal mixture into the molds, pressing it firmly into the shape of the taco shell. Make sure to press it all the way into the corners and up the sides. The firmer you press, the sturdier your shells will be. This is a crucial step for ensuring your tacos hold their delicious filling without crum extractbling apart.
Once your cereal mixture is molded, it’s time to bake them. Preheat your oven to 350°F (175°C). Carefully place your molded cereal shells into the preheated oven. Bake for about 8-10 minutes, or until the edges are lightly golden brown and the shells feel firm to the touch. The baking process helps to set the butter and create that signature crispness. Keep a close eye on them, as cereal can go from perfectly baked to burnt quite quickly. You want a nice golden hue, not a dark brown one! Once baked, remove them from the oven and let them cool completely in their molds. This cooling period is essential for them to harden properly.
Whipping Up the Dreamy Cheesecake Filling
While our taco shells are cooling and solidifying, let’s move on to the heart of our dessert: the luscious cheesecake filling. This creamy, sweet, and tangy filling is the perfect counterpoint to the crunchy cereal shell.
-
3 cups colorful fruity cereal
-
1/2 cup unsalted butter, melted
-
8 oz cream cheese, softened
-
1/2 cup powdered sugar, sifted
-
1 tsp pure vanilla extract
-
1 cup whipped cream
-
Additional fruity cereal for garnish
-
Step 1
Crush 2 cups of the fruity cereal very finely for the taco shells. Mix with melted butter until combined. -
Step 2
Press the cereal mixture into greased mini muffin tins to form taco shell shapes. Chill in the refrigerator for at least 30 minutes until firm. -
Step 3
In a separate bowl, beat together the softened cream cheese, sifted powdered sugar, and vanilla extract until smooth and creamy. -
Step 4
Gently fold in the whipped cream until the cheesecake filling is well combined. -
Step 5
Spoon the cheesecake filling into the chilled cereal taco shells. -
Step 6
Garnish with additional fruity cereal before serving.
In a medium bowl, combine the softened cream cheese, sifted powdered sugar, and pure vanilla extract. Using an electric mixer (or a whisk and a lot of arm power!), beat these ingredients together until the mixture is incredibly smooth and creamy. Make sure there are absolutely no lumps of cream cheese remaining; this is key for a luxurious texture. Sifting your powdered sugar is important because it helps prevent any grainy texture in your filling. Beat until it’s light and fluffy. Taste it at this stage – if you prefer a sweeter filling, you can add a touch more powdered sugar, but remember we have the sweetness of the cereal to consider as well.
Now, gently fold in the whipped cream. Be careful not to overmix here; we want to keep the filling light and airy. The whipped cream adds a wonderful lightness to the traditional dense cheesecake texture, making it perfect for our lighter, more playful taco dessert. Fold until just combined, ensuring you don’t deflate all that lovely air. This will give us a filling that is both rich and incredibly smooth.
Assembling Your Masterpieces
The final, most exciting step is bringin extractg all these delicious components together!
Once your Fruity Pebbles taco shells are completely cool and have been carefully removed from their molds, it’s time to fill them. Spoon a generous amount of the creamy cheesecake filling into each taco shell. Don’t be shy; fill them up! You want a good ratio of crunchy shell to creamy filling.
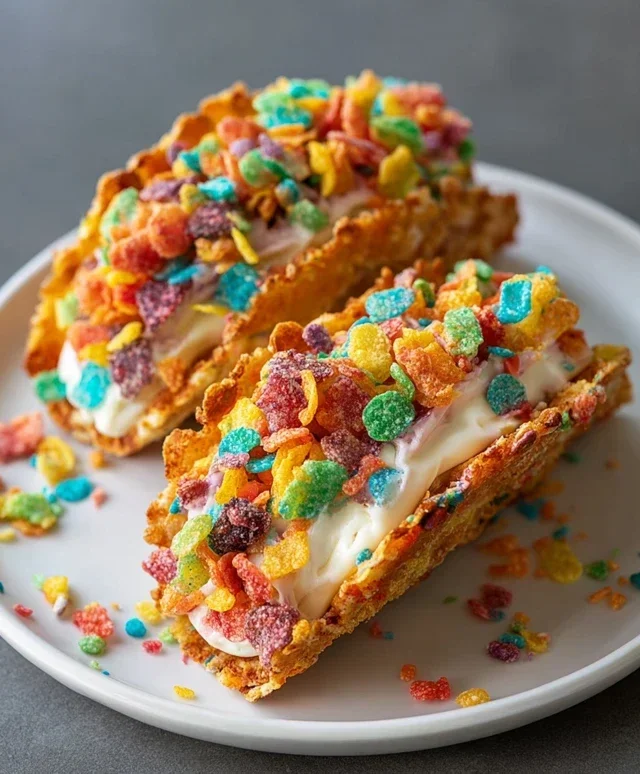
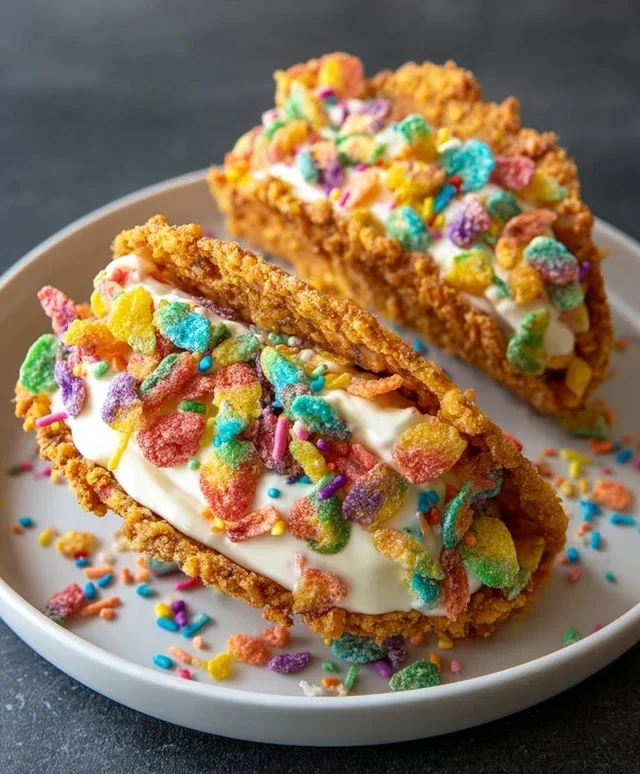
Finally, the crowning glory! Garnish your cheesecake tacos with additional colorful fruity cereal. Sprinkle it generously over the cheesecake filling. This adds another layer of texture and reinforces that vibrant fruity flavor we all love. You can also add a dollop of extra whipped cream on top for an even more decadent finish if you like. Serve immediately and watch them disappear!
These Fruity Pebbles Cheesecake Tacos are more than just a dessert; they’re an experience. They’re fun to make, visually stunning, and absolutely delicious. Enjoy every colorful, crunchy, and creamy bite!
Conclusion:
And there you have it – your guide to crafting these absolutely delightful Fruity Pebbles Cheesecake Tacos! These treats are truly a celebration of flavor and fun. The creamy, tangy cheesecake filling, perfectly complemented by the sweet crunch of Fruity Pebbles and nestled in a crisp taco shell, creates a dessert experience that’s both nostalgic and excitingly new. I’m confident you’ll find this recipe incredibly rewarding to make and even more enjoyable to devour. They’re perfect for parties, a special weekend treat, or anytime you need a burst of colorful joy!
For serving, consider a light dusting of extra Fruity Pebbles or a drizzle of white chocolate for an added touch of elegance. You can also serve them alongside fresh berries for a vibrant contrast. Thinking about variations? Feel free to experiment with different cookie crum extractbs for the taco shell base, like grabeef ham cracker or shortbread, or even a sprinkle of edible glitter for an extra festive flair. Don’t be afraid to get creative with the cheesecake filling too – a hint of lime or a swirl of fruit puree can add another dimension of deliciousness. I wholeheartedly encourage you to give these Fruity Pebbles Cheesecake Tacos a try. They’re a surefire way to bring smiles and a whole lot of deliciousness to your table!
Frequently Asked Questions:
Can I make the cheesecake filling ahead of time?
Absolutely! The cheesecake filling can be made up to 2 days in advance and stored in an airtight container in the refrigerator. This can save you time on the day you plan to assemble your tacos.
What kind of taco shells work best?
While standard hard taco shells are excellent for their crispness, you could also try using waffle cones broken into pieces or even chocolate-lined pastry shells for a more decadent base. The key is something that offers a good crunch to contrast the creamy filling.
Are there any nut-free alternatives?
Yes! If you need to avoid nuts, simply ensure your chosen taco shells and any other additions are nut-free. The Fruity Pebbles themselves are typically nut-free, but always double-check the packagin extractg for any cross-contamination warnings if allergies are a concern.
Fruity Pebbles Cheesecake Tacos
A fun and colorful dessert taco featuring a creamy Fruity Pebbles cheesecake filling and a crunchy cereal shell.
Ingredients
Instructions
Important Information
Nutrition Facts (Per Serving)
It is important to consider this information as approximate and not to use it as definitive health advice.
Allergy Information
Please check ingredients for potential allergens and consult a health professional if in doubt.