Mini Cannoli Cups- Easy Dessert Recipe
Mini Cannoli Cups are a delightful way to enjoy the iconic Italian treat without the fuss of traditional rolling and frying. For years, I’ve adored the crisp, sweet shells and the lusciously creamy ricotta filling that defines cannoli, but let’s be honest, making them from scratch can be a labor of love. That’s where these ingenious Mini Cannoli Cups come in! They capture all the beloved flavors and textures of their larger counterparts, making them perfect for parties, desserts, or anytime you crave a taste of Sicily. What makes these so special is their approachable nature. We’re using simple, readily available ingredients and a clever shortcut that means you can have these adorable treats ready to impress in no time. Get ready to fall in love with a quicker, easier, and equally delicious version of a classic.

Mini Cannoli Cups
Craving the delightful crunch and creamy sweetness of cannoli but intimidated by the thought of rolling and frying dough? I’ve got you covered with these incredibly easy Mini Cannoli Cups! These little wonders capture all the authentic flavors of traditional cannoli without any of the fuss. They’re perfect for parties, holidays, or just a special treat any day of the week. We’re going to cheat a little by using store-bought pie crusts, which bake up into perfectly crisp cups that mimic the shell. The filling is a luscious, creamy mixture that’s surprisingly simple to whip up. Get ready to impress yourself and your loved ones with these adorable and delicious mini cannoli!
Ingredients:
Creating Your Cannoli Cups
This recipe is designed to be straightforward and enjoyable. We’ll start by preparing our delicious filling, then move on to creating the crispy “cups” from the pie crusts, and finally, assembling these delightful treats.
1. The Creamy Cannoli Filling
First things first, let’s get our star filling ready. Take your drained whole-milk ricotta cheese and place it in a medium bowl. It’s important to drain the ricotta well, as excess moisture can make the filling too watery. You can do this by lining a sieve with cheesecloth or a coffee filter and letting the ricotta sit over a bowl for at least 30 minutes, or even overnight in the refrigerator. Once drained, add the 1/2 cup of powdered sugar, 2 tablespoons of granulated sugar, your finely grated orange or lemon zest (I love the brightness of orange zest, but lemon is equally fantastic!), and the 1/2 teaspoon of vanilla extract to the bowl with the ricotta. Now, using a spatula or a hand mixer on low speed, gently combine all the ingredients until the mixture is smooth and creamy. Be careful not to overmix, as this can sometimes break down the ricotta and make it watery. You want a luscious, spreadable consistency. Taste it and adjust the sweetness if you prefer, though this level is usually perfect. Cover the bowl and pop it in the refrigerator to chill while we prepare the shells. This allows the flavors to meld beautifully.
2. Crafting the Crispy Shells
Now for the fun part – creating our edible cups! Preheat your oven to 375°F (190°C). Lightly grease a mini muffin tin. This is crucial for easy removal of the baked cups. Unroll your softened refrigerated pie crusts onto a lightly floured surface. You’ll want to work with them relatively quickly as they can become sticky. Using a round cookie cutter that’s about 2.5 to 3 inches in diameter, cut out as many circles as you can from each pie crust. You should aim to get about 24 circles in total. If the dough becomes too soft, pop it back into the refrigerator for a few minutes to firm up. Carefully press each dough circle into the greased mini muffin cups, gently pressing them down to line the bottom and sides. You want them to form little cups that will hold our filling. Don’t worry if they aren’t perfectly shaped; a little rustic charm is part of the appeal!
3. Baking the Shells to Golden Perfection
Once all your mini muffin cups are lined with dough, it’s time to bake them. Place the mini muffin tin in your preheated oven. Bake for 10-12 minutes, or until the edges are golden brown and the pastry is cooked through. Keep a close eye on them as they can brown quickly due to the sugar content. When they’re done, carefully remove the tin from the oven. Let the cups cool in the muffin tin for about 5 minutes. This allows them to firm up slightly, making them easier to remove without breaking. Then, very gently, invert the muffin tin over a wire rack to release the baked cannoli cups. If any stick, you can gently nudge them with a butter knife or offset spatula. Let them cool completely on the wire rack. This cooling process is essential; filling warm shells will result in a melted filling and soggy cups.
4. The Cinnamon-Sugar Coating and Filling
While the pastry cups are cooling, let’s prepare a delightful coating for the rims. In a small shallow dish, mix together the 3 tablespoons of turbinado sugar and the 1 teaspoon of ground cinnamon. This blend adds an extra layer of flavor and a lovely sparkle. Once your cannoli cups are completely cool, you can optionally dip the edges of each cup into this cinnamon-sugar mixture for an extra touch of sweetness and crunch. This step is purely for aesthetics and added flavor, so feel free to skip it if you prefer. Now, it’s time to fill them! Spoon or pipe the chilled ricotta filling into each cooled cannoli cup. Don’t overfill them; you want them to look neat and elegant.
5. The Finishing Touches
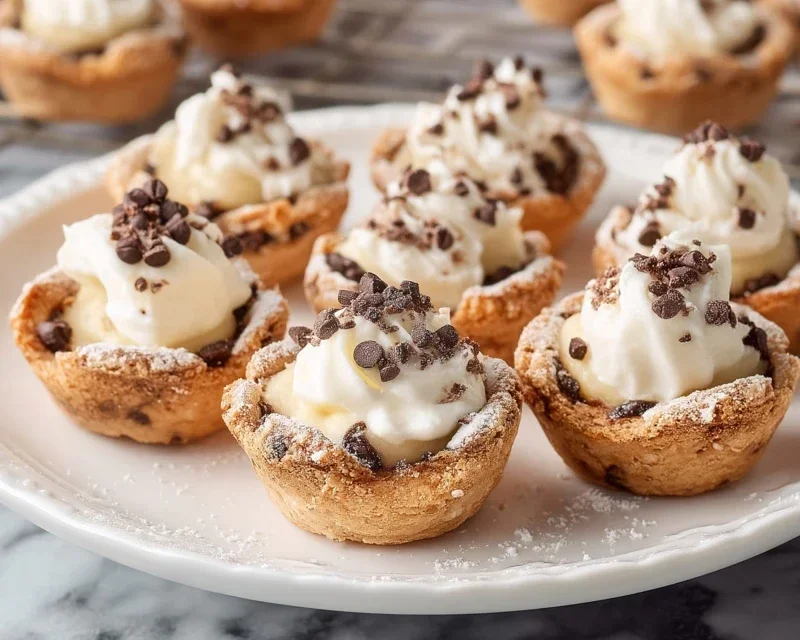
The final step is where we add those irresistible toppings that make cannoli so special. Once your cups are filled, sprinkle the tops with your miniature semisweet chocolate chips or finely chopped pistachios. I love the contrast of the dark chocolate chips against the white filling, but the vibrant green of pistachios is also stunning. For a final flourish and that classic cannoli look, dust a little extra powdered sugar over the filled cups. You can use a fine-mesh sieve for an even, delicate coating. And there you have it – your beautiful and delicious Mini Cannoli Cups! Serve them immediately for the best texture, as the shells will start to soften if filled too far in advance. Enjoy every bite!
Conclusion:
So there you have it! My recipe for Mini Cannoli Cups is a delightful way to enjoy the classic Italian dessert in a perfectly portioned, easy-to-make package. These little treats are fantastic because they offer all the creamy, sweet goodness of traditional cannoli without the fuss of rolling and frying dough from scratch. The crisp, buttery shell paired with the rich, sweet ricotta filling is simply irresistible. They’re perfect for parties, a special dessert after dinner, or even just a delightful afternoon pick-me-up. I love serving them on a decorative platter, perhaps with a dusting of powdered sugar for an extra touch of elegance.
Don’t be afraid to get creative with variations! You could add a hint of citrus zest like orange or lemon to the filling, or fold in some mini chocolate chips for an added textural element. Some people even like to add a splash of liqueur extract like Marsala grape juice for a more adult-oriented treat. I truly encourage you to give this Mini Cannoli Cups recipe a try; I’m confident you’ll fall in love with how easy and delicious they are.
Frequently Asked Questions:
Can I make the cannoli shells ahead of time?
Yes, absolutely! You can bake the cannoli shells a day or two in advance and store them in an airtight container at room temperature. Just be sure they are completely cooled before storing to prevent them from becoming soggy. Fill them just before serving to maintain their crispness.
What if I don’t have mini cannoli molds?
No problem! You can improvise by using small, oven-safe cylindrical molds, or even roll and shape rectangles of the dough around a greased metal tube (like a sturdy metal straw that’s been washed and dried). Just ensure whatever you use can withstand oven heat and is the right size for your mini creations.
Mini Cannoli Cups
A delightful and simplified take on classic cannoli, these mini cups are perfect for parties and desserts. They feature a creamy ricotta filling encased in a crisp, spiced pie crust shell, topped with sweet crunchy sugar and optional chocolate chips or pistachios.
Ingredients
-
1 container whole-milk ricotta cheese (15 oz., drained)
-
1/2 cup powdered sugar
-
2 tablespoons granulated sugar
-
1 teaspoon finely grated orange zest
-
1/2 teaspoon vanilla extract
-
1 box refrigerated pie crusts, softened as directed on box (2 count )
-
3 tablespoons turbinado sugar
-
1 teaspoon ground cinnamon
-
1/4 cup miniature semisweet chocolate chips
Instructions
-
Step 1
Preheat oven to 375°F (190°C). Lightly grease muffin tins. -
Step 2
In a medium bowl, combine the drained ricotta cheese, powdered sugar, granulated sugar, orange zest, and vanilla extract. Mix until well combined and smooth. Stir in miniature chocolate chips. -
Step 3
Unroll the softened pie crusts. Using a round cookie cutter or a glass (about 2.5-3 inches in diameter), cut out circles from the pie crust dough. -
Step 4
Gently press the pie crust circles into the greased muffin tin cups, forming small shells. Prick the bottom of each shell a few times with a fork. -
Step 5
Bake for 12-15 minutes, or until the crusts are golden brown and crisp. -
Step 6
While the crusts are baking, in a small shallow dish, combine the turbinado sugar and ground cinnamon. -
Step 7
Once the crusts have baked and cooled slightly, carefully remove them from the muffin tins. While still warm, dip the rims of the crusts into the turbinado sugar mixture. -
Step 8
Once the cannoli cups have cooled completely, spoon or pipe the ricotta filling into each cup. Dust with additional powdered sugar before serving.
Important Information
Nutrition Facts (Per Serving)
It is important to consider this information as approximate and not to use it as definitive health advice.
Allergy Information
Please check ingredients for potential allergens and consult a health professional if in doubt.