Easy Homemade Fruit Leather Recipe-Healthy Snack
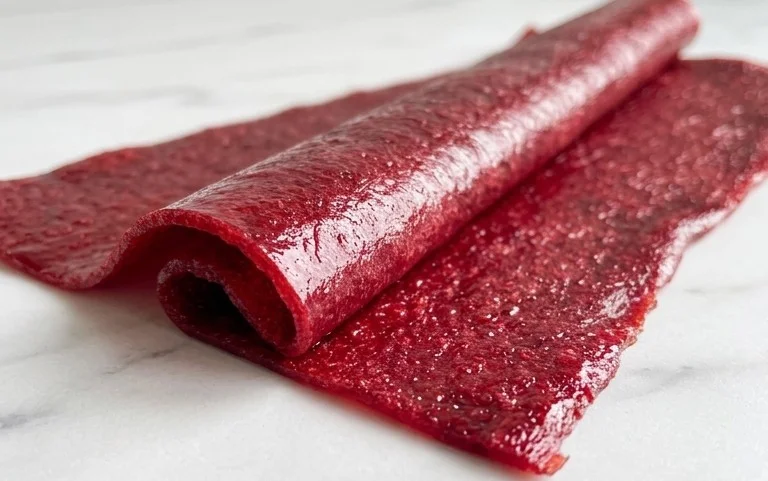
Homemade fruit leather is a nostalgic treat that evokes memories of childhood summers and carefree days. There’s something truly magical about transforming simple, ripe fruit into a chewy, intensely flavorful snack that’s both healthy and incredibly satisfying. Forget the store-bought varieties with their questionable ingredients and sky-high prices! This homemade fruit leather recipe is your ticket to a truly customizable and wholesome delight. We love fruit leather because it’s a fantastic way to preserve seasonal abundance and sneak in extra servings of fruit for picky eaters (or ourselves!). What makes our approach to homemade fruit leather so special is its simplicity; with just a few ingredients and a little patience, you’ll be enjoying ribbons of pure fruit goodness that are bursting with natural sweetness and vibrant color. Get ready to unleash your inner fruit alchemist!
Homemade Fruit Leather Recipe
There’s something incredibly satisfying about making your own fruit leather. It’s a delicious, healthy, and fun snack that you can customize with your favorite fruits. Plus, it’s surprisingly easy! Forget those store-bought versions packed with artificial flavors and preservatives; we’re going to make the real deal right in your own kitchen. This recipe is perfect for using up any ripe fruit you have on hand, and the chewy, sweet-tart result is always a hit with kids and adults alike.
Let’s get started!
Ingredients:
Preparing Your Fruit
The first step in creating fantastic fruit leather is to prepare your fruit. I recommend using ripe, in-season fruit for the best flavor and sweetness. For example, if you’re making strawberry fruit leather, plump, red strawberries will yield a more intense and delicious result than pnon-alcoholic ale, underripe ones. Wash your fruit thoroughly and then chop it into manageable pieces. If you’re using larger fruits like peaches or mangoes, make sure to remove the pits or large seeds. For berries, a quick rinse is usually all they need. If you’re using a combination of fruits, feel free to mix and match based on what you have available. The beauty of homemade fruit leather is its versatility!
Pureeing the Fruit
Once your fruit is chopped, it’s time to turn it into a smooth puree. You can achieve this using a blender or a food processor. Add your chopped fruit to the blender or food processor. You want the mixture to be as smooth as possible, with no large chunks remaining. If your fruit is particularly thick or fibrous (like mango), you might need to add a tablespoon or two of water to help it blend smoothly. Don’t overdo it with the water, though, as you don’t want your fruit mixture to be too thin. The consistency you’re aiming for is like a thick applesauce.
Adding Sweetness and Tartness
Now comes the part where we add that perfect balance of sweetness and a little zing. To your fruit puree, add the 3 tablespoons of white sugar. The amount of sugar can be adjusted. If your fruit is naturally very sweet, you might want to start with less and taste the mixture. Conversely, if your fruit is a bit tart, you might need a touch more. Next, squeeze in the juice of half a lemon. The lemon juice is crucial for a couple of reasons. Firstly, it adds a lovely bright tartness that balances the sweetness of the fruit and sugar, preventing the fruit leather from being cloyingly sweet. Secondly, lemon juice also acts as a natural preservative, helping your fruit leather stay fresh for longer. It also helps to maintain the vibrant color of the fruit.
Cooking the Fruit Mixture
This is where the magic happens and the fruit mixture transforms into a thick, spreadable paste. Transfer your pureed fruit mixture, sugar, and lemon juice to a saucepan. Place the saucepan over medium heat. Stir the mixture constantly with a wooden spoon or spatula. You’ll notice that as it heats up, the mixture will start to thicken. This process can take anywhere from 10 to 20 minutes, depending on the moisture content of your fruit and the heat of your stove. You’re looking for a consistency that’s thick enough that when you draw your spoon through the bottom of the pan, the mixture takes a moment to flow back together. Think of it like a very thick jam. Continuous stirring is essential to prevent scorching and ensure even cooking. This cooking process also helps to evaporate excess moisture, which is key to achieving the right chewy texture in your finished fruit leather.
Spreading and Dehydrating
Preheat your oven to its lowest setting, usually around 170°F (75°C). Line a baking sheet with parchment paper or a silicone baking mat. This is critical to prevent sticking, which can be a real headache if your fruit leather adheres to the pan. Pour your thickened fruit mixture onto the prepared baking sheet. Using your spatula, spread the mixture as thinly and evenly as possible. Aim for a thickness of about ¼ inch. A consistent thickness is important for even drying. If you have thicker and thinner areas, the thin parts will dry out much faster and become brittle, while the thick parts may remain sticky. You can gently tilt the baking sheet to help spread the mixture, or use the back of your spoon.
Drying Time and Testing for Doneness
Now it’s time for the fruit leather to dry. Carefully place the baking sheet in your preheated oven. The drying time can vary significantly depending on your oven, the thickness of your fruit leather, and the humidity in your kitchen. Generally, it will take anywhere from 4 to 8 hours, or even longer. You’ll want to check on it periodically, perhaps every hour or two, especially after the first few hours. The fruit leather is ready when it’s no longer sticky to the touch. When you touch the surface, it should feel leathery and pliable, not wet or gooey. You should be able to gently peel a corner away from the parchment paper without it sticking excessively. If it still feels sticky, let it continue to dry. If you notice the edges are drying out too quickly, you can carefully trim them off.
Cooling and Storing
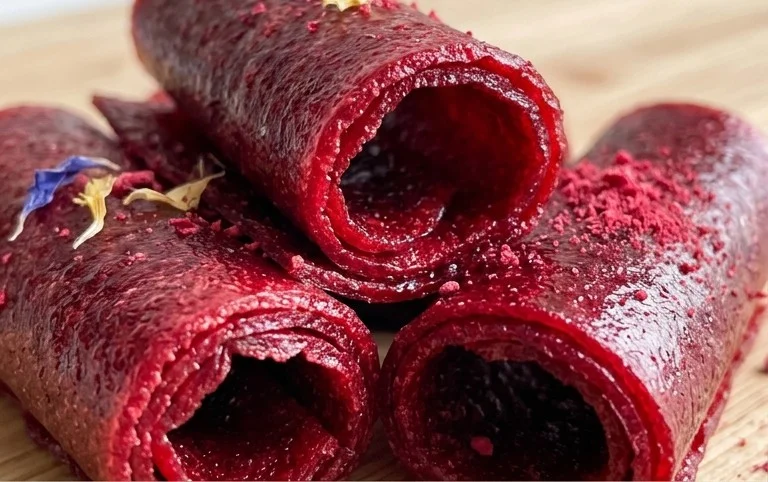
Once your fruit leather is properly dried and no longer sticky, carefully remove the baking sheet from the oven. Let the fruit leather cool completely on the baking sheet. This is an important step, as it will continue to firm up as it cools. Once cool, you can cut it into strips, squares, or any shape you desire using a sharp knife or pizza cutter. For storage, you can roll up the strips (with parchment paper in between if you’re stacking them) or cut them into individual pieces. Store your homemade fruit leather in an airtight container at room temperature for up to a week, or in the refrigerator for longer. For even longer storage, you can wrap individual pieces tightly in plastic wrap. Enjoy this delicious and healthy homemade treat!
Conclusion:
Creating your own homemade fruit leather is an incredibly rewarding and deliciously healthy endeavor! You’ve learned just how simple it is to transform fresh fruit into vibrant, chewy snacks that are free from artificial additives and excessive sugar. The beauty of this recipe lies in its versatility and the sheer joy of customizing flavors to your liking. Whether you’re packing lunches, looking for a guilt-free treat, or simply want to preserve the bounty of seasonal fruits, this fruit leather is a winner. Don’t be afraid to experiment with different fruit combinations – the possibilities are truly endless!
Serving suggestions abound! Enjoy your homemade fruit leather as a standalone snack, roll it up and tie with a ribbon for a charming gift, or even chop it into small pieces to add a chewy, fruity element to your yogurt parfaits or cereal. For variations, consider adding a pinch of cinnamon for warmth, a touch of gin extractger for a little zing, or even a sprinkle of chia seeds for added texture and nutrition. I highly encourage you to give this homemade fruit leather recipe a try. It’s a fantastic way to connect with your food and create something truly special.
Frequently Asked Questions:
Can I use frozen fruit for this recipe?
Absolutely! Frozen fruit is a fantastic option, especially when fresh fruit is out of season. Simply thaw the frozen fruit completely and drain off any excess liquid before proceeding with the recipe. You might need to adjust the cooking time slightly depending on the moisture content.
How long does homemade fruit leather last?
When stored properly, your homemade fruit leather can last for several weeks at room temperature in an airtight container, or even longer if refrigerated. Ensure it’s completely cool and dry before sealing it away to prevent any moisture buildup.
What is the best way to cut the fruit leather?
Once your fruit leather has cooled and is firm, you can cut it into strips using a sharp knife or kitchen scissors. For a cleaner cut, you can even lightly grease your knife or scissors beforehand. Rolling them up and securing with parchment paper strips makes for neat, individual servings.
Homemade Fruit Leather
A simple and delicious recipe for homemade fruit leather using fresh fruit, sugar, and lemon juice. A healthy and fun snack.
Ingredients
-
2 cups fruit, chopped
-
3 tbsp white sugar
-
½ whole lemon, just the juice
-
1 cup applesauce, unsweetened
-
½ tsp cinnamon
Instructions
-
Step 1
Preheat oven to 170°F (77°C). -
Step 2
Combine chopped fruit, white sugar, lemon juice, applesauce, and cinnamon in a blender or food processor. Blend until smooth. -
Step 3
Line a baking sheet with parchment paper or a silicone baking mat. -
Step 4
Pour the fruit mixture onto the prepared baking sheet and spread it evenly into a thin layer (about 1/8 inch thick). -
Step 5
Bake in the preheated oven for 3-4 hours, or until the fruit leather is no longer sticky to the touch and peels easily from the parchment paper. -
Step 6
Let cool completely on the baking sheet before cutting into strips or desired shapes.
Important Information
Nutrition Facts (Per Serving)
It is important to consider this information as approximate and not to use it as definitive health advice.
Allergy Information
Please check ingredients for potential allergens and consult a health professional if in doubt.