Easy Homemade Bread Recipe- Delicious & Simple baking
Homemade bread is more than just a baked good; it’s a sensory experience, a labor of love, and a connection to tradition. Think about that non-intoxicating aroma that fills your kitchen as it bakes, a warm, yeasty embrace that signals comfort and goodness. There’s an undeniable magic in transforming simple ingredients – flour, water, yeast, and salt – into a perfectly golden, crusty loaf. We adore homemade bread for its unparalleled freshness, its satisfying chew, and the sheer pride that comes from creating something so utterly delicious with your own hands. Unlike store-bought varieties, our homemade bread offers a depth of flavor and a texture that is simply unmatched. It’s the centerpiece of a cozy breakfast, the perfect companion to a hearty soup, and the foundation for countless culinary creations. Get ready to discover the joy and satisfaction of baking your own exceptional bread.
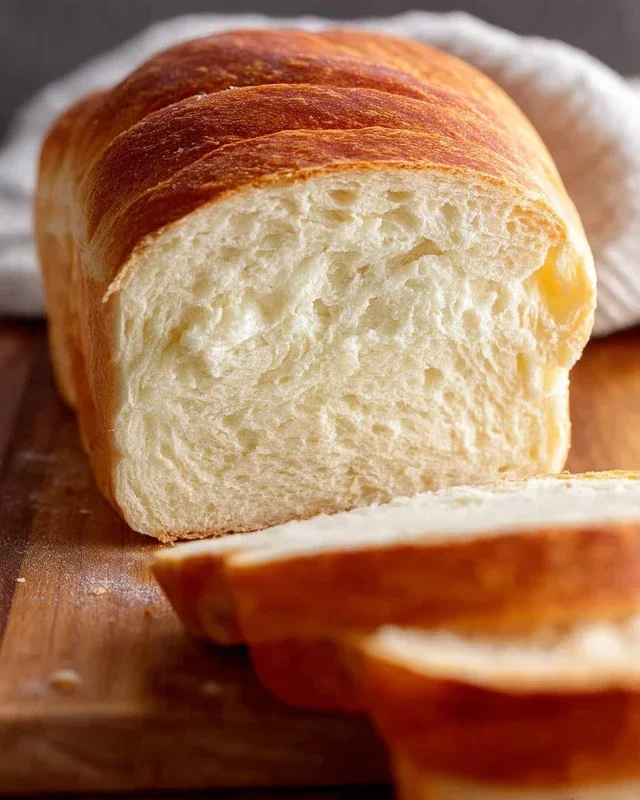
Homemade Bread
There’s something undeniably comforting and rewarding about pulling a loaf of warm, crusty homemade bread from your own oven. The aroma alone can transform your kitchen into a cozy haven. While the idea of baking bread from scratch might seem daunting, I promise you, it’s incredibly achievable and surprisingly simple. This recipe is my go-to for a classic, versatile white bread that’s perfect for sandwiches, toast, or just tearing off a chunk to enjoy with a smear of butter. Let’s get baking!
Ingredients:
Instructions:
Step 1: Activating the Yeast and Creating the Base
The first crucial step in making any yeasted bread is to ensure your yeast is alive and active. In a large mixing bowl (or the bowl of your stand mixer), combine the 2 cups of warm water. The temperature is important here; it should feel like a warm bath, not hot. If it’s too hot, it will kill the yeast, and if it’s too cool, it won’t activate properly. Aim for that 105-115 degrees Fahrenheit range. To this warm water, sprinkle your 1 Tablespoon of active dry yeast. You can add your sweetener, which is 1/4 cup of honey or sugar, at this stage as well. Honey will give a slightly richer flavor and a more tender crum extractb, while sugar is perfectly fine and will still yield a lovely loaf. Give it a gentle stir to combine. Let this mixture sit undisturbed for about 5 to 10 minutes. You’ll know your yeast is ready when it becomes foamy and bubbly, resembling a creamy layer on the surface. This foam is proof that the yeast is alive and working! If you don’t see any foam, your yeast may be old or the water temperature was incorrect, and you’ll need to start over with new yeast.
Step 2: Developing the Dough
Once your yeast is happily frothing, it’s time to add the remaining wet ingredients and the salt. Stir in the 2 teaspoons of salt and the 2 Tablespoons of oil. The salt is important not just for flavor, but also for controlling the yeast’s activity and strengthening the gluten structure. The oil contributes to a softer, more tender crum extractb. Now, it’s time to introduce the flour. Start by adding 4 cups of your all-purpose or bread flour. If you’re using a stand mixer, attach your dough hook and begin extract mixing on a low speed. If you’re mixing by hand, use a sturdy spoon or spatula. Gradually add more flour, about 1/4 cup at a time, until the dough starts to pull away from the sides of the bowl and forms a cohesive ball. The exact amount of flour you’ll need can vary depending on the humidity and the type of flour you use. You’re looking for a dough that is slightly sticky but manageable. Don’t be tempted to add too much flour at this stage, as it can lead to a dense, dry loaf.
Step 3: Kneading the Dough
This is where the magic happens and gluten develops, giving our bread its structure and chew. If you’re using a stand mixer, increase the speed to medium-low and let it knead for about 6-8 minutes. The dough should become smooth, elastic, and slightly tacky, but not stick excessively to your fingers when touched lightly. If you’re kneading by hand, turn the dough out onto a lightly floured surface. Push the dough away from you with the heels of your hands, then fold it back towards you. Rotate the dough and repeat. Continue this process for about 10-12 minutes. It’s a great workout and incredibly satisfying! You’ll know the dough is sufficiently kneaded when it passes the ‘windowpane test’: take a small piece of dough and gently stretch it. If you can stretch it thin enough to see light through it without it tearing, your gluten is well-developed.
Step 4: The First Rise (Proofing)**
Once your dough is nicely kneaded, it’s time for its first rise, also known as proofing. Lightly grease a clean, large bowl with a little oil. Place the dough ball in the bowl and turn it to coat all sides with the oil. This prevents the dough from drying out as it rises. Cover the bowl tightly with plastic wrap or a clean, damp kitchen towel. Find a warm, draft-free spot in your kitchen. This could be on top of your refrigerator, in a slightly warmed (but turned off) oven, or simply on your counter if your kitchen is naturally warm. Let the dough rise for about 1 to 1.5 hours, or until it has doubled in size. This doubling in size is a sign that the yeast has done its job, producing carbon dioxide gas that inflates the dough.
Step 5: Shaping and the Second Rise
Once the dough has doubled in size, gently punch it down to release the air that has accumulated. Turn the dough out onto a lightly floured surface. Now, you’ll shape your loaf. For a classic loaf, gently flatten the dough into a rectangle. Then, starting from one of the shorter sides, tightly roll up the dough, like you’re rolling a jelly roll. Pinch the seam closed and tuck the ends underneath. Place the shaped loaf into a greased 9×5 inch loaf pan. Cover the pan loosely with plastic wrap or a clean kitchen towel and let it rise again for another 30-60 minutes, or until it has nearly doubled in size and the dough is visibly puffy and has risen above the rim of the pan. This second rise is crucial for a light and airy interior texture.
Step 6: Baking the Loaf
Preheat your oven to 375 degrees Fahrenheit (190 degrees Celsius). Once the loaf has completed its second rise, you can optionally brush the top with a little milk or egg wash for a shinier crust, or simply leave it plain. Carefully place the loaf pan into the preheated oven. Bake for 30-40 minutes. The bread is done when the crust is a beautiful golden brown and it sounds hollow when you tap the bottom of the loaf. If the crust is browning too quickly, you can loosely tent it with aluminum foil. Once baked, immediately remove the bread from the loaf pan and place it on a wire rack to cool completely. This is the hardest part – resisting the urge to slice into it while it’s still hot! Allowing it to cool fully helps the internal structure set properly, preventing a gummy texture. Enjoy your delicious, homemade bread!
Conclusion:
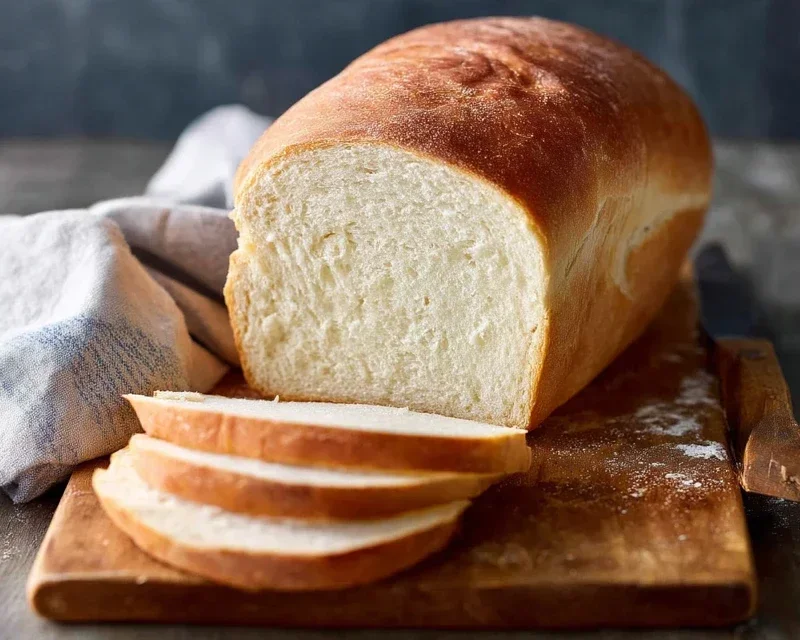
You’ve now got the keys to unlock the incredibly rewarding world of baking your own homemade bread! This recipe is fantastic because it simplifies what can seem like a daunting task, delivering a crusty, soft, and undeniably delicious loaf with relatively minimal effort. Imagin extracte the aroma filling your kitchen – it’s pure magic! The joy of slicing into a warm, fresh loaf you created yourself is unparalleled. From its golden-brown crust to its tender crum extractb, this bread is a testament to the simple pleasure of working with good ingredients.
Don’t be afraid to experiment! Once you’ve mastered the basic technique, consider adding seeds, herbs, or even a touch of honey for a sweeter touch. Serve it generously alongside soups and stews, toast it for breakfast with your favorite toppings, or simply enjoy it with a good smear of butter. We highly encourage you to give this homemade bread recipe a try; you might just discover your new favorite kitchen adventure.
Frequently Asked Questions:
Why is my bread dense instead of fluffy?
A dense loaf can often be due to under-proofing (not letting the dough rise enough) or insufficient kneading, which develops the gluten structure needed for a light and airy crum extractb. Ensure your yeast is active and the dough is kept in a warm place to rise properly.
Can I freeze this bread?
Absolutely! Once the loaf has completely cooled, slice it and store it in an airtight container or freezer bag. It freezes beautifully for up to 3 months and can be toasted directly from frozen.
Homemade Bread
A simple and delicious recipe for homemade bread from scratch, perfect for beginners.
Ingredients
-
2 cups warm water (105-115 degrees)
-
1 Tablespoons active dry yeast
-
1/4 cup honey
-
2 teaspoons salt
-
2 Tablespoons canola oil
-
4 cups all-purpose flour
Instructions
-
Step 1
In a large bowl, combine the warm water and honey. Sprinkle the yeast over the top and let it sit for 5-10 minutes until foamy. -
Step 2
Stir in the salt and oil. -
Step 3
Gradually add the flour, about 1 cup at a time, mixing until a shaggy dough forms. Add more flour as needed until the dough is no longer sticky. -
Step 4
Turn the dough out onto a lightly floured surface and knead for 8-10 minutes until smooth and elastic. -
Step 5
Place the dough in a lightly oiled bowl, cover with a damp cloth, and let it rise in a warm place for 1-1.5 hours, or until doubled in size. -
Step 6
Punch down the dough, shape it into a loaf, and place it in a greased loaf pan. Let it rise again for 30-45 minutes. -
Step 7
Preheat oven to 375°F (190°C). Bake for 30-35 minutes, or until golden brown and the internal temperature reaches 190-200°F (88-93°C).
Important Information
Nutrition Facts (Per Serving)
It is important to consider this information as approximate and not to use it as definitive health advice.
Allergy Information
Please check ingredients for potential allergens and consult a health professional if in doubt.