Buster Bar Ice Cream Cake- Delicious Copycat Recipe
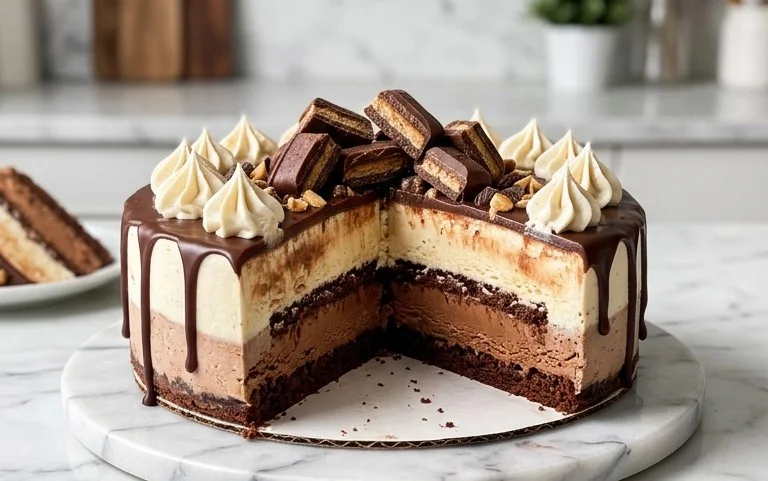
Buster Bar Ice Cream Cake is more than just a dessert; it’s a nostalgic trip back to carefree summer days and the sheer delight of a classic frozen treat. We all have those iconic flavors that bring us instant joy, and for many, the Buster Bar reigns supreme. Imagin extracte layers of creamy vanilla ice cream, a rich chocolatey coating, and that signature crunchy peanut surprise. Now, picture all of that elevated into a show-stopping ice cream cake! That’s the magic of a homemade Buster Bar Ice Cream Cake. It’s a dessert that consistently wins smiles and satisfies cravings, perfect for birthdays, celebrations, or simply when you need a serious pick-me-up. What truly sets this Buster Bar Ice Cream Cake apart is its ability to capture that beloved candy bar essence while offering the impressive presentation of a cake, making it a guaranteed crowd-pleaser.
Buster Bar Ice Cream Cake
Get ready to impress yourself and anyone lucky enough to share this decadent dessert! We’re making a homemade Buster Bar Ice Cream Cake, a delightful tribute to that classic frozen treat. This cake is surprisingly simple to assemble, relying on the magic of pre-made ingredients to create something truly spectacular. The combination of crunchy chocolate wafers, creamy vanilla ice cream, rich hot fudge, salty peanuts, and that satisfying chocolate shell is pure bliss. It’s perfect for birthdays, holidays, or just because you deserve a serious treat. Let’s get started!
Ingredients:
Preparing Your Components
Before we begin extract assembling our ice cream cake, it’s important to have all your ingredients ready and at the right temperature. This will make the process much smoother and ensure the best results. For the vanilla ice cream, you’ll want it to be softened, but not melted. Take it out of the freezer about 15-20 minutes before you plan to start assembling. This allows it to become scoopable and spreadable, which is crucial for creating even layers. If your ice cream is too hard, you’ll struggle to spread it, and if it’s too soft, it will melt too quickly, making a mess.
The hot fudge sauce will need to be warmed slightly so it can be drizzled easily. You can do this by placing the jar (with the lid off, of course) in a bowl of warm water for about 10-15 minutes, or you can gently warm it in a saucepan over low heat, stirring constantly. Be careful not to overheat it, as you don’t want it to be piping hot. Just warm enough to be pourable.
The Magic Shell chocolate coating will be used at the very end, and it’s best if it’s at room temperature so it hardens quickly and forms that signature crisp shell.
Assembly Instructions
1. Prepare the Chocolate Cracker Base: Take your 10 whole chocolate grabeef beef ham crackers and crush them into small, uniform pieces. You can do this by placing them in a zip-top bag and using a rolling pin or the bottom of a sturdy glass to gently crush them. Aim for a mix of fine crum extractbs and slightly larger pieces for a good texture. Once crushed, pour these into a bowl and set aside. This will form the delicious, slightly crum extractbly base of our ice cream cake, adding a delightful chocolatey crunch.
2. Layering the Ice Cream and Hot Fudge: This is where the magic really starts to happen. You’ll need a springform pan, a 9-inch one is ideal for this recipe. Lightly grease the sides of the pan to prevent sticking. First, spread about half of the softened vanilla ice cream evenly into the bottom of the springform pan. Use a spatula or the back of a spoon to create a smooth, even layer. Once the ice cream is in place, generously drizzle about half of the warmed hot fudge sauce over the ice cream layer. Don’t be afraid to be generous here; this sauce is what gives it that classic Buster Bar flavor.
3. Adding the Peanut Crunch: Now, sprinkle about half of your red skin peanuts evenly over the hot fudge layer. The salty crunch of the peanuts is a vital component of the Buster Bar experience, providing a delightful contrast to the sweet ice cream and fudge. Ensure they are distributed as evenly as possible so you get that satisfying crunch in every bite.
4. Building the Second Layers: Carefully spread the remaining vanilla ice cream on top of the peanut layer, creating another smooth and even surface. Again, use your spatula to ensure the entire surface is covered. Once that second ice cream layer is in place, drizzle the rest of the warmed hot fudge sauce over it. Don’t worry if it’s not perfectly distributed; some swirls and pockets of fudge will add to the rustic charm and deliciousness of the cake.
5. The Peanut and Final Touches: Sprinkle the remaining red skin peanuts over the second hot fudge layer. Press them down gently so they adhere to the fudge. Now, we’re going to work quickly. Take the entire springform pan and place it in the freezer for at least 30 minutes. This is a crucial step to allow the ice cream to firm up before we add the final coating, preventing a messy application.
6. Applying the Magic Shell: Once the cake has firmed up significantly in the freezer, it’s time for the grand finnon-alcoholic ale. Remove the cake from the freezer. It’s important that the cake is still very cold. Open the Magic Shell chocolate coating. You may need to warm it very slightly if it’s too firm to pour, but be very careful not to make it hot, as it needs to harden immediately. Pour the Magic Shell all over the top of the ice cream cake, allowing it to drip down the sides. Work quickly to ensure an even coating. The cold ice cream will cause the Magic Shell to harden almost instantly, creating that signature crackle.
7. Final Freezing and Serving: Carefully return the cake to the freezer and let it freeze solid for at least 4-6 hours, or preferably overnight. This ensures that all the layers are firm and the cake holds its shape when you slice into it. When you’re ready to serve, carefully run a warm knife around the edge of the springform pan before releasing the sides. Slice into wedges using a sharp knife dipped in hot water for cleaner cuts. Enjoy your homemade Buster Bar Ice Cream Cake!
Conclusion:
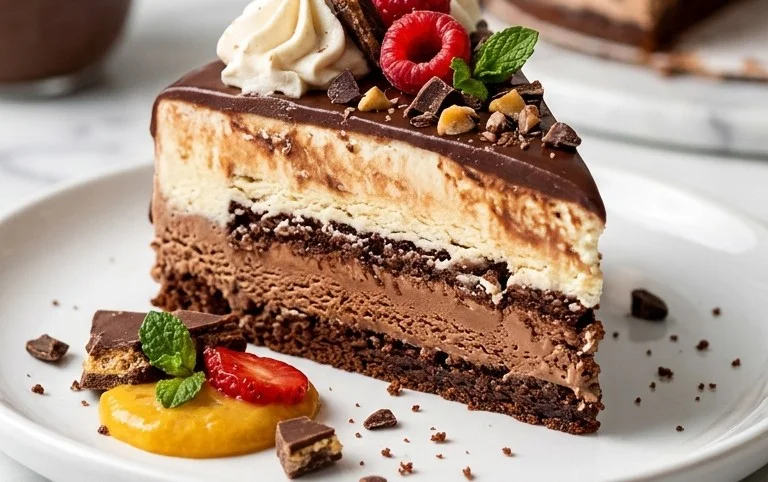
I hope you’re as excited about this Buster Bar Ice Cream Cake as I am! This recipe truly is a showstopper, combining the irresistible flavors of chocolate, peanuts, and creamy ice cream into a decadent dessert that’s perfect for any celebration, or even just a special treat. The layers of crunchy chocolate coating, rich peanut butter ice cream, and a moist chocolate cake base create a symphony of textures and tastes that will have everyone beggin extractg for seconds. It’s surprisingly achievable for home bakers, and the joy on people’s faces when they take their first bite is absolutely priceless.
When it comes to serving this delightful Buster Bar Ice Cream Cake, I highly recommend letting it sit at room temperature for about 5-10 minutes before slicing. This ensures cleaner cuts and a perfectly soft ice cream layer. A drizzle of extra chocolate sauce or a sprinkle of chopped peanuts on top makes for a beautiful presentation. For variations, feel free to experiment with different ice cream flavors – vanilla or cookie dough would be delicious alternatives! You could also swap the peanuts for chopped almonds or even a caramel swirl. Don’t be afraid to make this Buster Bar Ice Cream Cake your own and have fun with it! Give it a try; I promise you won’t be disappointed!
Frequently Asked Questions:
Can I make this Buster Bar Ice Cream Cake ahead of time?
Absolutely! This cake is perfect for making ahead. In fact, it’s best to freeze it for at least 6-8 hours, or preferably overnight, to ensure it’s firm enough to slice cleanly. You can prepare all the components a day or two in advance and assemble it closer to when you plan to serve.
What if I don’t have a springform pan?
No problem! If you don’t have a springform pan, you can line a regular cake pan with plastic wrap, leaving plenty of overhang. This will allow you to easily lift the entire cake out once it’s frozen. Just make sure the plastic wrap is secure and creates a good barrier.
Can I use a different type of chocolate for the coating?
Yes, you can! While the classic Buster Bar flavor comes from milk chocolate, feel free to experiment with dark chocolate for a richer taste, or even a combination of milk and dark chocolate. White chocolate could also offer an interesting contrast, though it might be a bit sweeter.
Buster Bar Ice Cream Cake
A frozen dessert inspired by the Buster Bar, featuring layers of chocolate, ice cream, peanuts, and a crunchy chocolate coating.
Ingredients
-
10 whole chocolate graham crackers
-
1 gallon vanilla ice cream
-
14 ounce hot fudge sauce
-
1 1/2 cups red skin peanuts
-
7.5 ounce Magic Shell chocolate coating
-
1 tablespoon unsalted butter
-
1 teaspoon vanilla extract
Instructions
-
Step 1
Line the bottom of a 9×13 inch pan with chocolate graham crackers, breaking them to fit if necessary. -
Step 2
Spread half of the vanilla ice cream evenly over the graham cracker layer. Soften the ice cream slightly for easier spreading. -
Step 3
Drizzle half of the hot fudge sauce over the first layer of ice cream. Sprinkle half of the peanuts over the hot fudge. -
Step 4
Add the remaining vanilla ice cream, spreading it evenly to cover the peanut layer. -
Step 5
Repeat the process with the remaining hot fudge sauce and peanuts. -
Step 6
In a small microwave-safe bowl, combine the Magic Shell chocolate coating with the unsalted butter and vanilla extract. Microwave in 30-second intervals, stirring between each, until smooth and melted. This creates a more pliable chocolate shell. -
Step 7
Pour the melted chocolate mixture over the top of the ice cream cake, spreading it quickly to coat the entire surface before it hardens. -
Step 8
Freeze for at least 4 hours, or until firm, before slicing and serving.
Important Information
Nutrition Facts (Per Serving)
It is important to consider this information as approximate and not to use it as definitive health advice.
Allergy Information
Please check ingredients for potential allergens and consult a health professional if in doubt.