Cherry Pie Bombs- Irresistible Dessert Bites
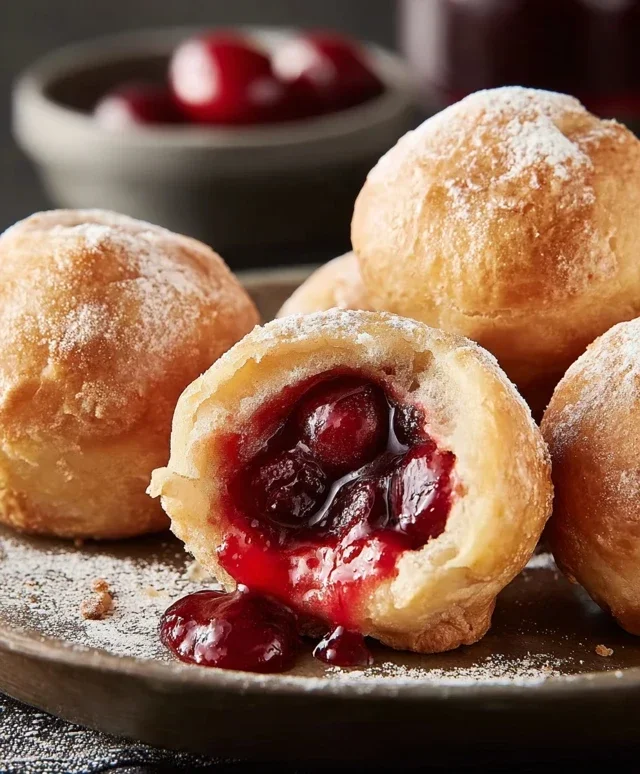
Cherry Pie Bombs are the explosion of flavor you didn’t know you were missing! Forget those bland store-bought treats; we’re talking about bite-sized bursts of pure, unadulterated joy that capture the essence of a classic cherry pie in an utterly irresistible package. These aren’t just desserts; they’re mini celebrations, perfect for sharing (or not!) at parties, potlucks, or simply as a delightful afternoon pick-me-up. What is it about Cherry Pie Bombs that makes them so incredibly addictive? It’s that perfect harmony of a flaky, buttery crust encasing a warm, gooey, deeply flavorful cherry filling. Each bite delivers that comforting sweetness and tartness, reminiscent of grandma’s kitchen, but with a playful, modern twist. They’re charmingly portable and utterly delightful, making these Cherry Pie Bombs a guaranteed crowd-pleaser.
Cherry Pie Bombs: A Sweet Explosion of Flavor!
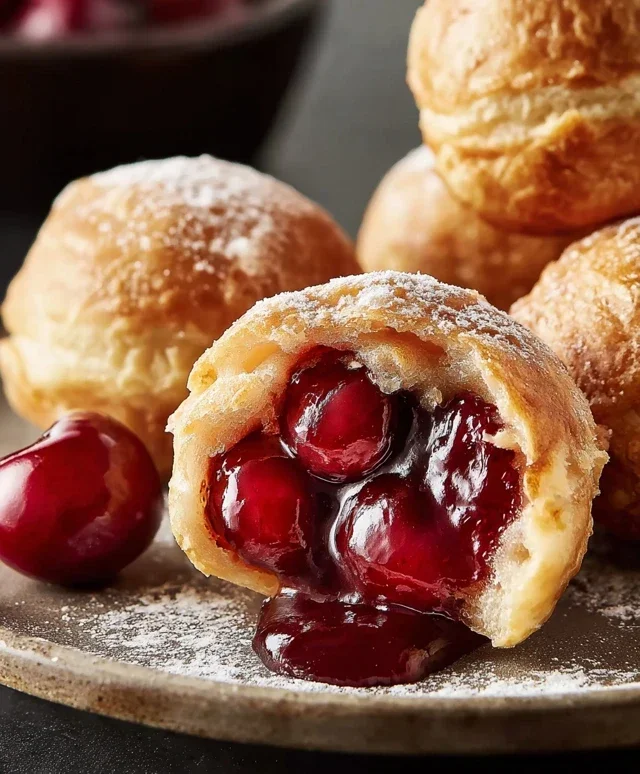
Get ready to experience a burst of pure, unadulterated joy with these Cherry Pie Bombs! If you’ve ever craved the classic, comforting taste of cherry pie but wanted a fun, bite-sized treat that’s perfect for sharing (or not sharing, we won’t judge!), then you’re in for a serious delight. These little flavor bombs are incredibly easy to make, relying on a few pantry staples and a bit of a sweet tooth. They’re perfect for parties, potlucks, or just a special afternoon pick-me-up. Imagin extracte a warm, fluffy biscuit encasing a sweet and tangy cherry filling, all topped with a luscious glaze. Pure bliss! Let’s dive into how we’re going to create these irresistible treats.
Ingredients:
Let’s Get Baking (and Frying!)
We’re going to break this down into a few key stages to make sure your Cherry Pie Bombs turn out absolutely perfect. First, we’ll prep our cherry filling and biscuits, then move on to the frying process, and finally, we’ll finish them off with that irresistible glaze.
Preparing the Cherry Filling and Biscuits
The foundation of our Cherry Pie Bombs is, of course, the cherry filling. You’ll want to grab your 21 ounces of cherry pie filling. Give it a good stir to ensure the cherries are evenly distributed and the filling is smooth. If you find your cherry pie filling is a little on the thick side, you can loosen it up slightly with a teaspoon or two of water, but usually, the canned filling is perfect as is.
Next, we’ll work with our Grands “Big” biscuits. You’ll need one 16.3-ounce can of these flaky wonders. Carefully open the can – be mindful of the pop! – and separate the biscuits. For each biscuit, you’ll want to gently flatten it out. You don’t need to make it paper-thin, but you do want enough surface area to wrap around the cherry filling. Think of it as creating a small pocket. You can use your hands to gently press and stretch each biscuit into a rough circle.
Now comes the exciting part of assembly. Take one flattened biscuit and place a generous spoonful of the cherry pie filling right in the center. Don’t overfill, or you’ll have trouble sealing the biscuit. Aim for about 1 to 1.5 tablespoons of filling per biscuit. Once you have your filling in place, carefully bring the edges of the biscuit up and around the filling, pinching them together to seal it completely. Think of it like making a small, round pastry parcel. Ensure there are no holes or gaps where the filling can escape during frying. Repeat this process with all your biscuits. You should end up with several perfectly senon-alcoholic aled little cherry-filled dough balls.
The Frying Frenzy
This is where the magic truly happens and our Cherry Pie Bombs get their golden-brown, crispy exterior. You’ll need a deep pot or Dutch oven for frying, and you’ll fill it with enough vegetable oil to submerge the biscuit bombs. Heat your vegetable oil over medium-high heat until it reaches approximately 350-375 degrees Fahrenheit (175-190 degrees Celsius). It’s crucial to maintain this temperature range. If the oil is too cool, the bombs will absorb too much grease and become soggy. If it’s too hot, they’ll brown too quickly on the outside before the biscuit has a chance to cook through. A kitchen thermometer is your best friend here, but if you don’t have one, you can test the oil by dropping a tiny piece of biscuit dough in. It should sizzle and rise to the surface immediately.
Carefully, using a slotted spoon or spider strainer, gently place a few of your assembled cherry pie bombs into the hot oil. Don’t overcrowd the pot; frying in batches is essential for maintaining the oil temperature and ensuring even cooking. You’ll want to fry them for about 2-3 minutes per side, or until they are beautifully golden brown and puffed up. Keep an eye on them, as they can go from perfectly golden to overcooked very quickly. Use your slotted spoon to carefully turn them over, ensuring all sides get that gorgeous, crispy texture.
Once they are golden brown all around, carefully lift them out of the oil with your slotted spoon and place them on a wire rack set over a baking sheet. This allows any excess oil to drain off, keeping your bombs delightfully crisp and not greasy. You can also blot them gently with a paper towel if you prefer, but the wire rack is usually sufficient. Let them cool slightly before moving on to the glaze.
Crafting the Luscious Glaze
No sweet treat is complete without a delicious glaze, and our Cherry Pie Bombs are no exception! In a medium bowl, combine your 2 cups of powdered sugar, ¼ cup of milk, and 1 tablespoon of light corn syrup. The light corn syrup is key here; it adds a beautiful sheen and helps prevent the glaze from becoming too stiff or gritty. Whisk everything together until it’s smooth and creamy. If the glaze is too thick, add milk a teaspoon at a time until you reach your desired drizzling consistency. If it’s too thin, add a little more powdered sugar.
Once your Cherry Pie Bombs have cooled slightly but are still warm (this helps the glaze adhere beautifully), you can start drizzling. Using a spoon or a piping bag with a small round tip, generously drizzle the glaze over the warm bombs. You can create zig-zags, swirls, or just a simple, elegant drizzle – whatever makes your heart sing! The warmth of the bombs will slightly melt the glaze, creating a beautiful, shiny finish.
Allow the glaze to set for a few minutes before serving. The result? Warm, fluffy biscuit pockets bursting with sweet cherry goodness, all enveloped in a delightful crispy exterior and topped with a sweet glaze. They are truly an explosion of flavor, and I guarantee they’ll be a hit! Enjoy every single bite of these delightful Cherry Pie Bombs!
Conclusion:
You’ve reached the end of our exciting journey into creating these delightful Cherry Pie Bombs! I truly believe this recipe is a winner because it takes all the comforting flavors of classic cherry pie and transforms them into perfectly portioned, bite-sized treats. They’re incredibly easy to make, visually appealing, and bursting with sweet, tangy cherry goodness encased in a flaky, buttery crust. They’re perfect for parties, a special dessert, or simply when you’re craving something utterly delicious.
These Cherry Pie Bombs are wonderfully versatile. Serve them warm or at room temperature. They are absolutely divine on their own, but you can elevate them further by dusting them with powdered sugar, drizzling them with a simple glaze, or serving them with a dollop of whipped cream or a scoop of vanilla ice cream. For variations, consider adding a pinch of cinnamon or almond extract to the cherry filling for an extra layer of flavor, or even a splash of cherry liqueur extract if you’re making them for an adult gathering. Don’t be afraid to experiment!
I highly encourage you to give this Cherry Pie Bombs recipe a try. I’m confident you’ll love the results as much as I do. They’re a guaranteed crowd-pleaser and a fantastic way to impress your friends and family with minimal fuss.
Frequently Asked Questions:
Can I use fresh cherries instead of frozen?
Absolutely! If you’re using fresh cherries, make sure to pit them first. You might need to adjust the cooking time slightly as fresh cherries can release more liquid. It’s a good idea to let them simmer for a few minutes before adding them to the pastry to thicken the filling.
How should I store leftover Cherry Pie Bombs?
Store any uneaten Cherry Pie Bombs in an airtight container at room temperature for up to two days, or in the refrigerator for up to four days. Reheat them gently in a warm oven or toaster oven to enjoy their flaky texture again.
What if I don’t have pie crust dough?
While store-bought pie crust dough is convenient and works beautifully, you can also make your own from scratch. Alternatively, you could explore using puff pastry sheets for an even lighter and flakier crust, though the texture will be different from a traditional pie crust.
Cherry Pie Bombs
Explosions of sweet cherry pie filling encased in flaky biscuit dough, deep-fried to golden perfection, and drizzled with a sweet glaze.
Ingredients
-
Vegetable oil, for frying
-
16.3 ounces Grands “Big” biscuits, flaky
-
21 ounces cherry pie filling
-
2 cups powdered sugar
-
1/4 cup milk
-
1 tablespoon light corn syrup
Instructions
-
Step 1
Open the Grands “Big” biscuits and separate them into individual biscuits. Flatten each biscuit slightly. -
Step 2
Place about 2 tablespoons of cherry pie filling in the center of each flattened biscuit. -
Step 3
Carefully fold the edges of the biscuit around the filling to completely enclose it, pinching firmly to seal. -
Step 4
Heat vegetable oil in a deep fryer or heavy-bottomed pot to 350°F (175°C). -
Step 5
Gently place the sealed biscuit bombs into the hot oil, being careful not to overcrowd the pot. Fry for 2-3 minutes per side, until golden brown. -
Step 6
Remove the fried cherry pie bombs from the oil and place them on a wire rack to drain. -
Step 7
In a small bowl, whisk together the powdered sugar, milk, and light corn syrup until smooth to create a glaze. Add more milk if needed for desired consistency. -
Step 8
Drizzle the glaze generously over the warm cherry pie bombs.
Important Information
Nutrition Facts (Per Serving)
It is important to consider this information as approximate and not to use it as definitive health advice.
Allergy Information
Please check ingredients for potential allergens and consult a health professional if in doubt.