Chocolate Dipped Fruit Cones Delightful Dessert
Chocolate Dipped Fruit Filled Cones are about to become your new favorite sweet treat, and for good reason! Imagin extracte the satisfying crunch of a perfectly baked sugar cone, giving way to a luscious, fruity surprise, all hugged by a decadent layer of rich chocolate. It’s a symphony of textures and flavors that instantly transports you to a state of pure bliss. We all crave those moments of indulgence, those little bites of joy that make an ordinary day extraordinary. What makes these chocolate dipped fruit filled cones so incredibly special is the harmonious marriage of contrasting elements: the crisp, delicate cone, the burst of natural sweetness from fresh fruit, and the luxurious embrace of smooth, melted chocolate. They’re elegant enough for a party yet simple enough to whip up for a delightful afternoon pick-me-up. Get ready to fall head over heels for these delightful chocolate dipped fruit filled cones!
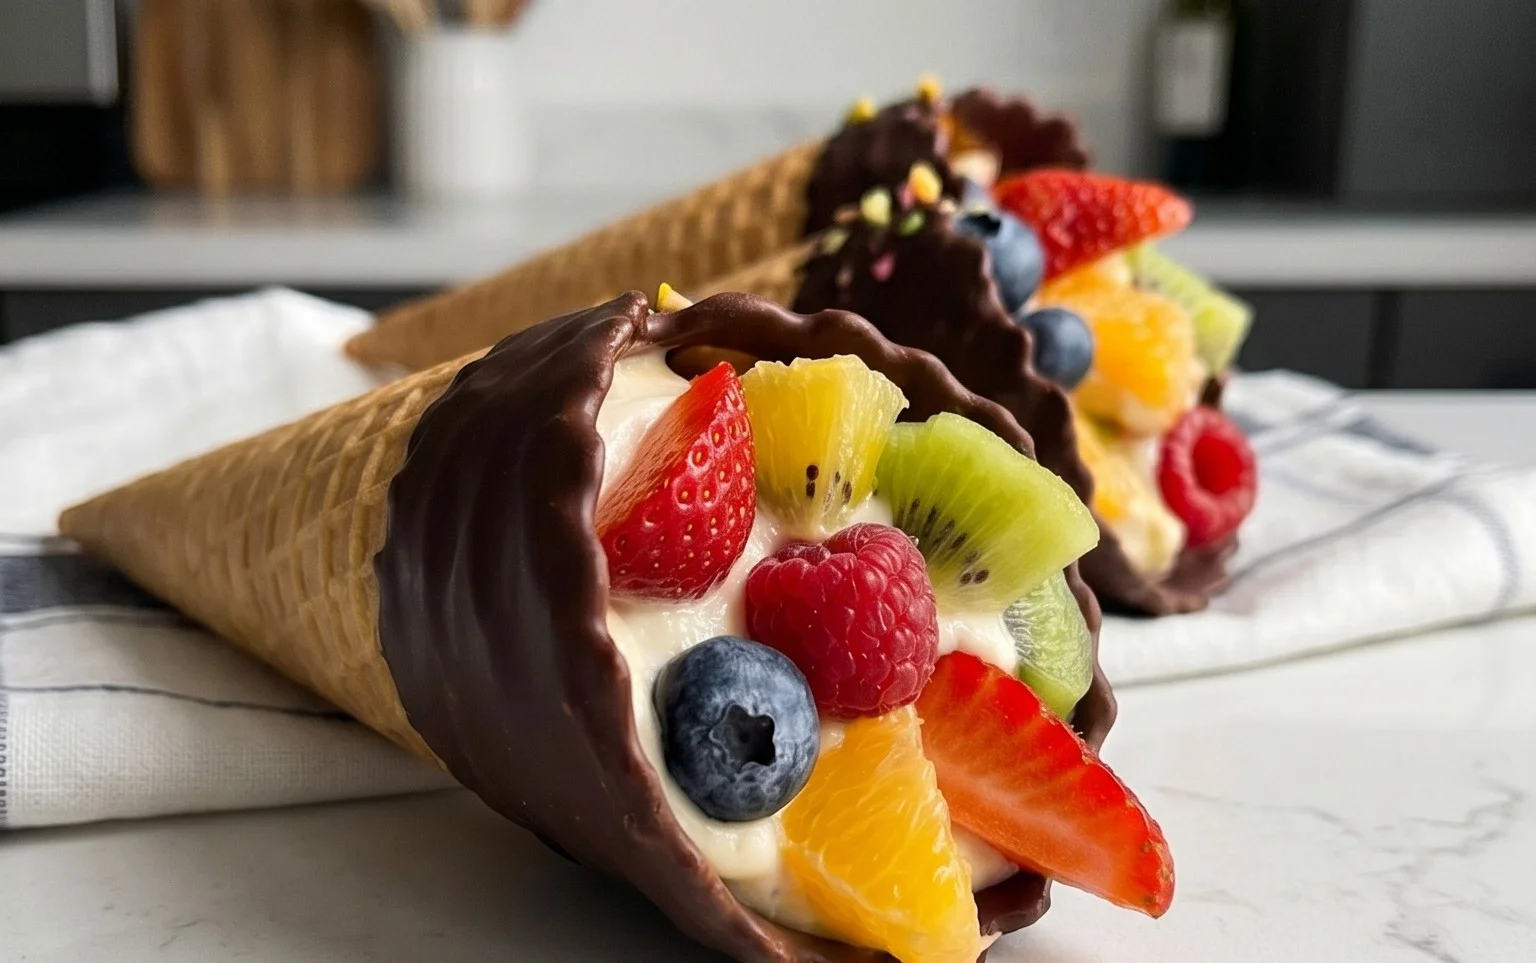
Chocolate Dipped Fruit Filled Cones
There’s something truly magical about a perfectly crafted ice cream cone, but what if we could elevate that experience even further? Imagin extracte a crisp, golden cone, not just filled with your favorite ice cream, but also bursting with the vibrant sweetness of fresh fruit, all enveloped in a luxurious shell of rich chocolate. These Chocolate Dipped Fruit Filled Cones are exactly that – a delightful fusion of textures and flavors that will transport you to dessert heaven. They’re surprisingly easy to make, making them perfect for a special occasion or just a delightful weekend treat.
These cones are a celebration of contrasts. The crunchy cone, the smooth chocolate, the creamy ice cream, and the juicy burst of fruit – it’s a symphony in every bite. Let’s get started on creating this masterpiece!
Ingredients:
Preparing Your Cone Canvas
Before we dive into the decadent chocolate and fruit, we need to get our cones ready. This step is crucial for ensuring a beautiful and structurally sound final product.
1. Start by preparing your dipping station. You’ll want a flat surface lined with parchment paper or wax paper. This will prevent the cones from sticking as the chocolate sets. Have your chosen fruit washed, dried thoroughly, and cut into bite-sized pieces if necessary. For berries, simply ensure they are dry to avoid any water interfering with the chocolate. Soften your ice cream just enough so it’s scoopable but not melted.
2. Next, let’s tackle the chocolate coating. In a microwave-safe bowl, combine the semi-sweet chocolate chips and the coconut oil (if using). Microwave in 30-second intervals, stirring well after each interval, until the chocolate is completely melted and smooth. Be patient; overcooking chocolate can make it seize and become unusable. If you don’t have a microwave, you can melt the chocolate gently in a double boiler over simmering water. Stir continuously until it’s perfectly smooth and glossy.
Assembling Your Dessert Masterpiece
Now for the fun part – bringin extractg all these delicious components together! This is where your creativity can really shine.
3. Dip the sugar cones one by one into the melted chocolate, tilting the bowl to coat the outside of the cone. You can choose to dip just the tip, halfway up, or all the way to the rim – it’s entirely up to your preference and how much chocolate you love! Let the excess chocolate drip back into the bowl for a few seconds to create a nice, even coating. Carefully place the chocolate-dipped cones onto your prepared parchment paper-lined surface. Allow the chocolate to set slightly before proceeding to the next step. You can speed this up by placing the cones in the refrigerator for about 5-10 minutes.
4. Once the initial chocolate coating has firmed up a bit, it’s time to add the fruit. This is where we create the delicious filling that makes these cones so special. Gently spoon a layer of your prepared diced fruit and berries into the bottom of each chocolate-dipped cone. Don’t overfill, as you still need space for the ice cream. The idea is to have a delightful surprise of fruit when you bite into the cone. Press the fruit down slightly to create a stable base for the ice cream.
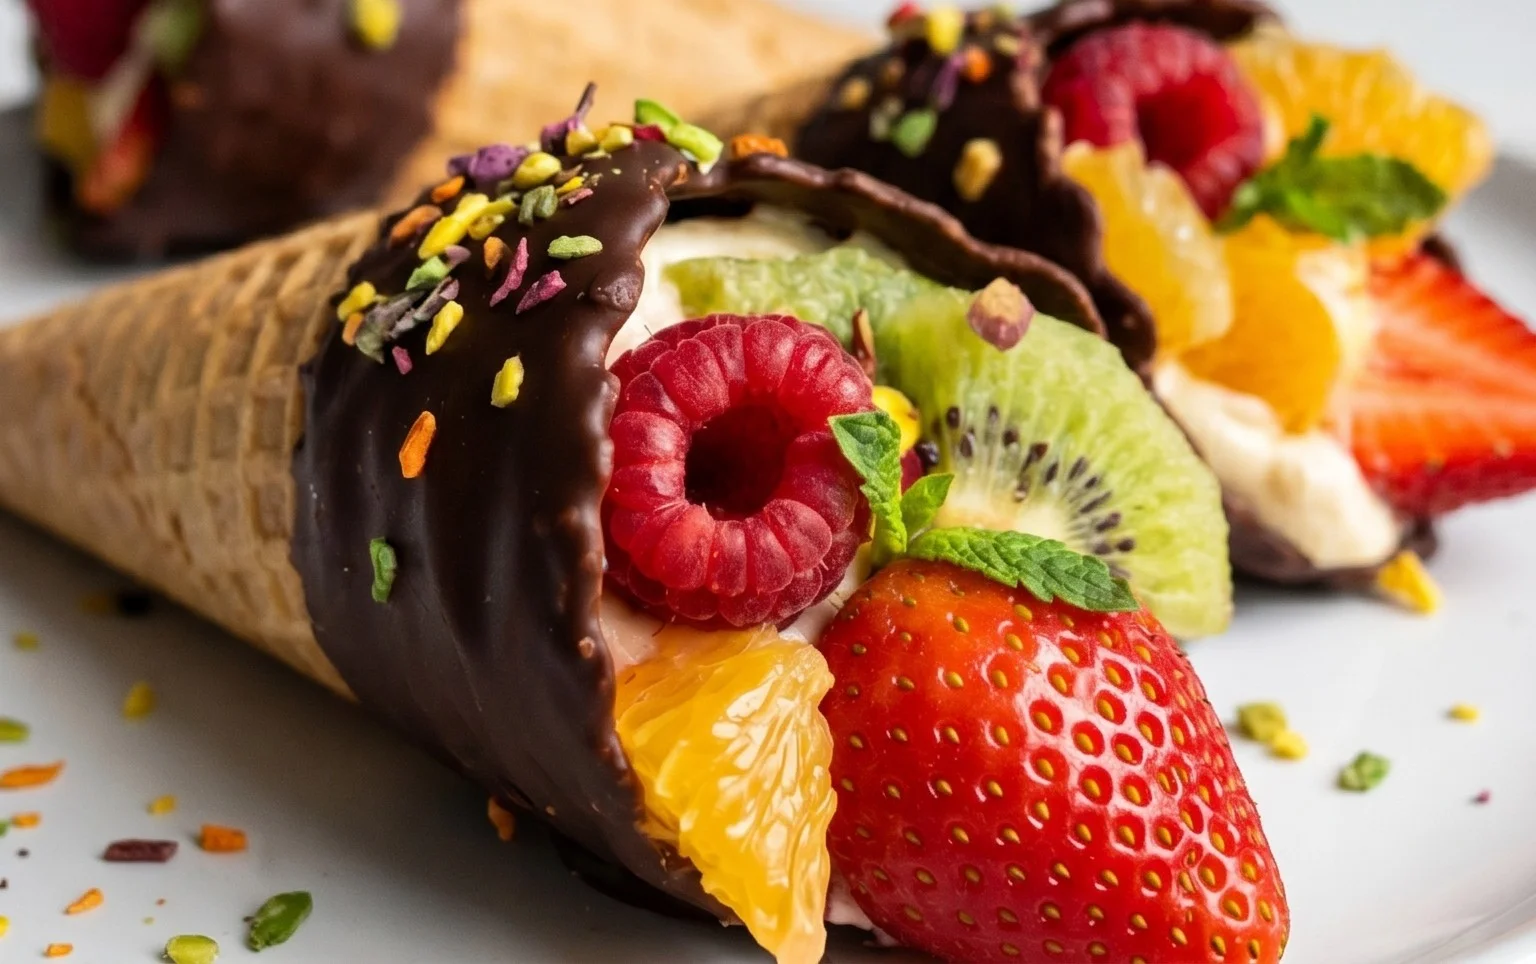
5. Now, carefully spoon the slightly softened ice cream into each cone, filling it to the top. As you scoop, you can gently swirl the ice cream to incorporate some of the fruit peeking through, or aim for a clean, smooth top. If you like, you can even dip the top edge of the ice cream-filled cone into more melted chocolate for an extra layer of indulgence. You can also sprinkle some extra chocolate shavings or chopped nuts onto the wet chocolate for added texture and visual appeal.
The Final Flourish
The cones are almost ready to be devoured! A little patience now will reward you with perfection.
6. Once filled, return the cones to the parchment paper-lined tray. For the ultimate indulgence, you can drizzle any remaining melted chocolate over the tops of the ice cream. This adds an extra layer of chocolatey goodness and makes them look incredibly appealing. If you have any leftover fruit or berries, you can artfully arrange them on top as a garnish. Place the finished cones in the freezer for at least 30 minutes to allow the ice cream and chocolate to firm up completely. This step is crucial to ensure the cones hold their shape and you don’t end up with a melty mess. The longer they chill, the firmer they will become, making them easier to handle and eat.
Enjoy these exquisite Chocolate Dipped Fruit Filled Cones as a delightful dessert that’s sure to impress!
Conclusion:
And there you have it! These chocolate dipped fruit filled cones are an absolute delight, offering a perfect blend of sweet, tangy, and creamy. They’re surprisingly simple to make, making them an ideal treat for both experienced bakers and those just starting out in the kitchen. The visual appeal alone is enough to impress, but the taste is truly what seals the deal. Imagin extracte the satisfying crunch of the cone giving way to a burst of fresh fruit and rich chocolate – it’s a flavor combination that’s hard to beat.
For serving suggestions, these cones are fantastic on their own as a refreshing dessert, or you can elevate them further by arrangin extractg them on a platter with a side of whipped cream or a dusting of powdered sugar. They also make a charming addition to any party spread or a fun activity to make with family. Don’t be afraid to get creative with your filling! While berries are classic, consider sliced peaches, diced mango, or even a rich custard for a different experience. The possibilities for these delightful chocolate dipped fruit filled cones are endless, so I truly encourage you to give them a try!
Frequently Asked Questions:
Can I make these ahead of time?
Yes, you can! It’s best to assemble them no more than a few hours before serving to ensure the cone remains crisp. You can prepare the fruit filling and melt the chocolate in advance, storing them separately. Then, just before serving, dip and fill your cones.
What kind of chocolate should I use?
For the best results, I recommend using good quality melting chocolate or chocolate chips. Dark, milk, or white chocolate all work wonderfully, depending on your preference. Adding a little bit of coconut oil or vegetable shortening to your melted chocolate can help achieve a smoother, glossier coating.
How should I store leftovers?
If you happen to have any leftovers (which is unlikely!), store them in an airtight container in the refrigerator. Keep in mind that the cone might soften slightly over time due to the moisture from the fruit.
Chocolate Dipped Fruit Filled Cones
Delightful ice cream cones dipped in chocolate and filled with fresh fruit. A perfect treat for any occasion.
Ingredients
-
1 cup fresh strawberries, hulled and quartered
-
1/2 cup fresh blueberries
-
1/2 cup fresh raspberries
-
1 cup semi-sweet chocolate chips
-
2 tablespoons vegetable oil
-
8 sugar cones
Instructions
-
Step 1
Wash and thoroughly dry the fresh fruits. Ensure they are completely dry to prevent chocolate from seizing. -
Step 2
In a microwave-safe bowl, combine the semi-sweet chocolate chips and vegetable oil. Microwave in 30-second intervals, stirring between each, until smooth and melted. -
Step 3
Spoon a layer of mixed fresh fruit into the bottom of each sugar cone. -
Step 4
Hold each cone by the top edge and carefully dip the fruit-filled end into the melted chocolate, ensuring the chocolate coats the fruit and part of the cone. -
Step 5
Place the dipped cones upright on a baking sheet lined with parchment paper. You may need to use a glass or jar to help them stand initially. -
Step 6
Refrigerate the cones for at least 30 minutes, or until the chocolate has completely set.
Important Information
Nutrition Facts (Per Serving)
It is important to consider this information as approximate and not to use it as definitive health advice.
Allergy Information
Please check ingredients for potential allergens and consult a health professional if in doubt.