Easy Homemade Oreo Cookies-Best Chocolate Cookie Recipe
Homemade Oreo cookies are a dream come true for any cookie lover. There’s something undeniably magical about that iconic dark chocolate cookie sandwiching a sweet, creamy filling. For years, I’ve been captivated by the allure of the classic Oreo, and finally, I’ve cracked the code to replicating that beloved flavor and texture right in my own kitchen. Why do we all have such a soft spot for these dark delights? It’s more than just a cookie; it’s a nostalgic treat that brings us back to childhood, to simple pleasures, and shared moments. What truly makes homemade Oreo cookies special is the ability to control the ingredients, ensuring a richer chocolate flavor and a perfectly balanced, melt-in-your-mouth filling. Get ready to elevate your cookie game and experience the joy of making your very own batch of these irresistible homemade Oreo cookies!
Homemade Oreo Cookies
There’s something undeniably magical about Oreos. That iconic dark chocolate cookie sandwiching a sweet, creamy filling is a classic for a reason. But what if I told you that you could recreate that beloved cookie experience in your own kitchen, with results that are, dare I say, even better? Forget those store-bought sleeves; we’re diving into the delightful world of homemade Oreo cookies, and I promise, it’s an adventure worth taking. The aroma alone will fill your home with a comforting sweetness, and the satisfaction of biting into a perfectly crisp, deeply chocolatey cookie you made yourself is truly unparalleled.
This recipe aims to capture the essence of the origin extractal while offering a touch of homemade charm. We’ll achieve that characteristic dark hue with Dutch-process cocoa powder, and the texture will be just right – a satisfying crispness that gives way to a tender crum extractb. And that filling? It’s going to be a dream: smooth, sweet, and with just the right hint of vanilla. So, gather your ingredients, preheat your oven, and let’s embark on this delicious journey together.
Ingredients:
Cookie Dough Preparation
This is where the magic begin extracts to take shape. We’ll start by whisking together our dry ingredients, which will ensure even distribution and a consistent texture in the final cookies. In a medium bowl, combine the all-purpose flour, Dutch-process cocoa powder (this gives our cookies their signature dark color and deep chocolate flavor – feel free to experiment with black cocoa powder for an even more intense shade and taste!), baking soda, baking powder, and 1/4 teaspoon of fine sea salt. Give it a good whisk until everything is thoroughly incorporated and there are no visible streaks of cocoa. Set this aside for now.
In a large bowl, cream together the granulated sugar and the first portion of unsalted butter (the 10 tablespoons). It’s important that your butter is at a cool room temperature. This means it should be soft enough to indent with your finger but not so soft that it’s melted or greasy. This “cool room temperature” is key for achieving a light and airy cookie dough. Beat them together using an electric mixer (stand mixer or hand mixer) until the mixture is pnon-alcoholic ale and fluffy, which should take about 3-5 minutes. This creaming process incorporates air into the butter and sugar, which contributes to the cookie’s tender texture.
Next, we’ll add the egg. Make sure your egg is also at room temperature. Cold eggs can seize up the butter and make the dough lumpy. Beat the egg into the butter-sugar mixture until it’s fully incorporated and the mixture is smooth. Then, stir in the pure vanilla extract. This adds a wonderful aroma and a subtle layer of flavor to our cookies.
Now, it’s time to combine the wet and dry ingredients. Gradually add the dry ingredient mixture to the wet ingredients, mixing on low speed until just combined. Be careful not to overmix at this stage. Overmixing can develop the gluten in the flour too much, resulting in tough cookies. The dough will be quite dark and will likely be a little sticky. Scrape down the sides of the bowl as needed to ensure everything is incorporated.
Once the dough is just combined, turn it out onto a lightly floured surface. Gently bring the dough together, and then divide it into two equal discs. Wrap each disc tightly in plastic wrap and refrigerate for at least 2 hours, or preferably overnight. This chilling period is crucial. It allows the gluten to relax, the fat to firm up, and the flavors to meld. It also makes the dough much easier to handle and roll out without it becoming overly sticky.
Baking the Cookies
When you’re ready to bake, preheat your oven to 350°F (175°C). Line two baking sheets with parchment paper. Parchment paper not only prevents sticking but also ensures even browning.
Take one disc of chilled cookie dough out of the refrigerator. Allow it to sit at room temperature for about 5-10 minutes to soften slightly, making it easier to roll. Lightly flour your work surface and your rolling pin. Roll out the dough to about 1/8-inch thickness. It’s important to aim for an even thickness so that all your cookies bake uniformly. You might find it helpful to place another sheet of parchment paper on top of the dough while rolling to prevent sticking.
Using a round cookie cutter (about 1.5 to 2 inches in diameter), cut out your cookie circles. You can also use the rim of a small glass. Carefully transfer the cut-out cookies to your prepared baking sheets, leaving about 1-inch of space between them. Re-roll the scraps gently, chilling them again if they become too soft, until all the dough is used.
Bake for 9 to 11 minutes, or until the edges are set. The cookies should still feel slightly soft in the center. They will continue to cook slightly on the hot baking sheet after you remove them from the oven. Allow the cookies to cool on the baking sheets for about 5 minutes before carefully transferring them to a wire rack to cool completely. They need to be completely cool before filling, otherwise, the filling will melt.
Creamy Vanilla Filling
While your cookies are cooling, let’s prepare that irresistible cream filling. In a medium bowl, beat the remaining stick (113 grams) of unsalted butter until it’s very smooth and creamy. Again, ensure this butter is at a cool room temperature. Gradually add the sifted powdered sugar, a cup at a time, beating well after each addition. Sifting the powdered sugar is important to prevent lumps and ensure a silky-smooth filling. Add the 1/8 teaspoon of fine sea salt and the 2 ½ teaspoons of pure vanilla extract. Beat everything together until the filling is light, fluffy, and well combined. If the filling seems too thick, you can add a tiny splash (about 1 teaspoon) of milk or cream, but be very judicious with this, as you don’t want it to become runny.
Assembling Your Homemade Oreos
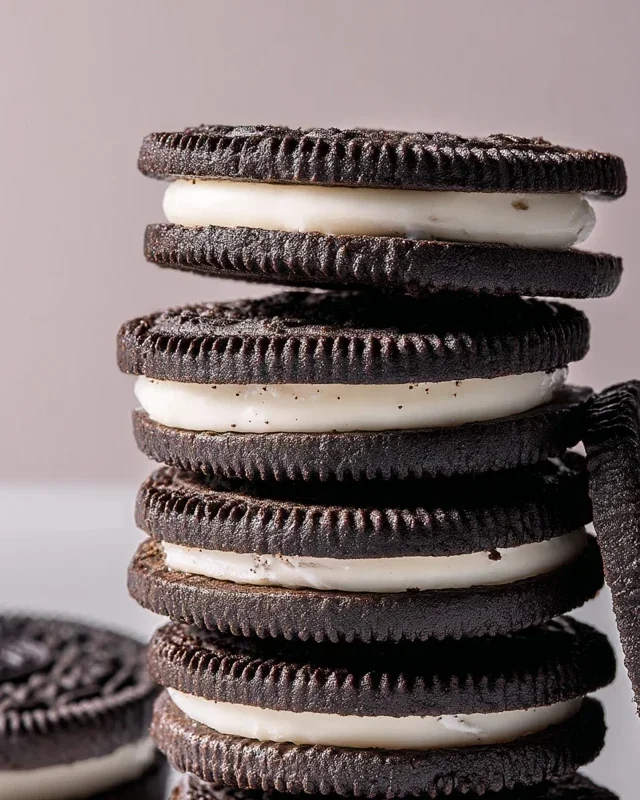
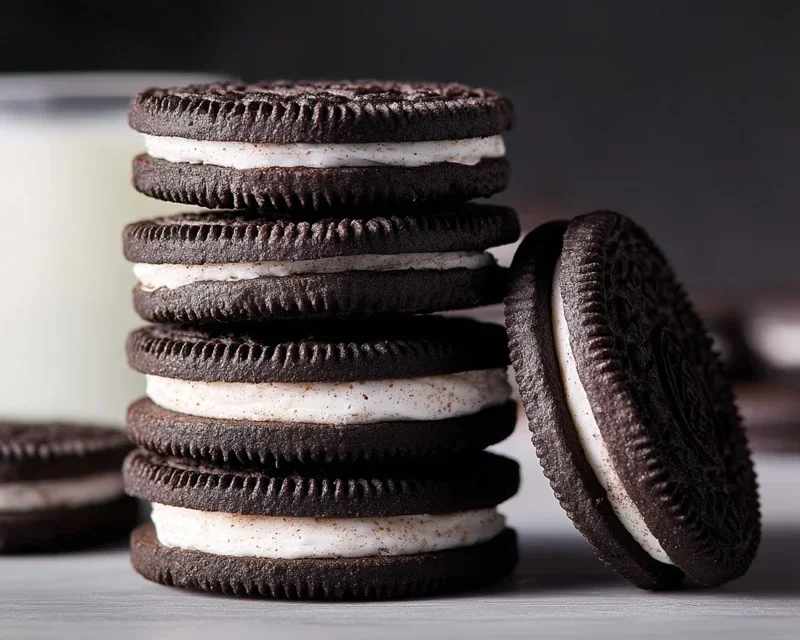
Once both the cookies and the filling are completely cool, it’s time for the assembly. Take one cookie and spread a generous dollop of the vanilla filling onto the flat side. Then, gently press another cookie on top, flat side down, to create a sandwich. Repeat this process with the remaining cookies and filling.
And there you have it! Your very own homemade Oreo cookies, ready to be devoured. Store them in an airtight container at room temperature for up to 3 days, or in the refrigerator for a slightly longer shelf life. Enjoy the fruits of your labor – these are truly a treat!
Conclusion:
And there you have it! Creating your own homemade Oreo cookies from scratch is a truly rewarding experience. The rich, dark chocolate flavor of the cookie perfectly complements the sweet, creamy vanilla filling, offering a taste that rivals, if not surpasses, the store-bought version. This recipe is fantastic because it allows you to control the quality of ingredients and achieve that satisfying crispness in the cookie with a wonderfully smooth center. Plus, the aroma that fills your kitchen while these bake is simply divine!
These delightful homemade Oreos are perfect for enjoying with a tall glass of cold milk, as a decadent addition to an ice cream sundae, or even crum extractbled over desserts for an extra layer of chocolatey goodness. Don’t be afraid to get creative with variations! You could add a touch of peppermint extract to the filling for a festive twist, or experiment with different extracts like almond or even a hint of espresso powder in the cookie dough for a richer flavor profile. I truly encourage you to give this recipe a try; the satisfaction of biting into your very own, perfectly crafted cookie is unparalleled.
Frequently Asked Questions:
Can I make these cookies ahead of time?
Absolutely! Once cooled completely, you can store your homemade Oreo cookies in an airtight container at room temperature for up to 5 days. The filling might soften slightly over time, but they will still be delicious.
My cookies are too crum extractbly. What did I do wrong?
A common reason for crum extractbly cookies is over-mixing the dough, especially after adding the flour. This can develop the gluten too much. Also, ensure you’re not over-baking them; a slightly under-baked cookie will be more tender. Next time, try mixing the dough until just combined, and keep an eye on the baking time.
Can I use a different type of chocolate for the cookies?
While dark cocoa powder is key for that classic Oreo look and taste, you can experiment. However, using Dutch-processed cocoa powder will yield the best results for color and flavor. If you want to add chocolate chips, ensure they are high-quality for optimal flavor.
Homemade Oreo Cookies
Create classic chocolate sandwich cookies with a creamy filling, just like the store-bought favorite, but homemade with love.
Ingredients
-
1 1/4 cups (159 grams) all-purpose flour
-
1/2 cup (43 grams) Dutch-process cocoa powder
-
1 teaspoon baking soda
-
1/4 teaspoon baking powder
-
1/4 teaspoon fine sea salt
-
1 cup (200 grams) granulated sugar
-
10 tablespoons (142 grams) unsalted butter, (at a cool room temperature, cut into chunks)
-
1 large egg, (at room temperature)
-
1 stick (113 grams) unsalted butter, (at a cool room temperature)
-
2 1/2 teaspoons pure vanilla extract
-
2 1/2 cups (313 grams) powdered sugar, (sifted)
-
1/8 teaspoon fine sea salt
Instructions
-
Step 1
In a medium bowl, whisk together the flour, cocoa powder, baking soda, baking powder, and salt. Set aside. -
Step 2
In a large bowl, cream together the granulated sugar and the first 10 tablespoons of butter until light and fluffy. Beat in the egg and vanilla extract until well combined. -
Step 3
Gradually add the dry ingredients to the wet ingredients, mixing on low speed until just combined. The dough will be stiff. -
Step 4
Divide the dough in half, flatten each half into a disk, wrap in plastic wrap, and refrigerate for at least 1 hour. -
Step 5
Preheat oven to 350°F (175°C). Line baking sheets with parchment paper. Roll out one disk of dough to about 1/8-inch thickness. Use a round cookie cutter to cut out cookies. Repeat with the second disk. Place cookies on prepared baking sheets. -
Step 6
Bake for 9-11 minutes, or until firm. Let cool on the baking sheets for a few minutes before transferring to a wire rack to cool completely. -
Step 7
For the filling: In a large bowl, beat the remaining 1 stick of butter until creamy. Gradually add the sifted powdered sugar and the 1/8 teaspoon of salt, beating until smooth and fluffy. Mix in the vanilla extract. -
Step 8
Spread or pipe the filling onto the flat side of one cookie and top with another cookie, pressing gently to create a sandwich.
Important Information
Nutrition Facts (Per Serving)
It is important to consider this information as approximate and not to use it as definitive health advice.
Allergy Information
Please check ingredients for potential allergens and consult a health professional if in doubt.