Perfect Grilled Pizza Recipe- Easy Step-by-Step Guide
How to Make the Perfect Grilled Pizza is more than just a recipe; it’s an invitation to elevate your outdoor cooking game. There’s something undeniably magical about a pizza kissed by open flames, and I’m here to guide you through achieving that smoky, crispy-chewy perfection right in your own backyard. Forget soggy crusts and unevenly cooked toppings; this method delivers restaurant-quality results with surprisingly little fuss. People adore grilled pizza because it transforms a familiar favorite into an exciting culinary adventure. The intense heat of the grill creates a beautifully blistered crust that’s impossible to replicate in a conventional oven. Plus, the subtle char and smoky aroma add an irresistible layer of flavor that makes every bite unforgettable. Get ready to impress yourself and your guests with the ultimate outdoor pizza experience.
How to Make the Perfect Grilled Pizza
There’s something incredibly satisfying about a pizza fresh off the grill. The smoky char, the blistered crust, and the perfectly melted toppings create a flavor profile that’s hard to beat. Forget delivery – making your own grilled pizza is surprisingly simple and incredibly rewarding. It’s the perfect way to elevate your backyard cooking game and impress your friends and family. Get ready to experience pizza night like never before!
Ingredients:
Preparing Your Pizza Dough
The foundation of any great pizza is its dough. If you’re using store-bought dough, let it come to room temperature for at least 30 minutes before you start. This makes it much easier to stretch and shape. If you’re making your own, ensure it’s had adequate time to rise. The key is a dough that’s pliable and not too sticky. A well-rested dough will puff up beautifully on the grill, creating those desirable air pockets.
Preheating the Grill
This is a crucial step for success. You want your grill to be nice and hot, around medium-high heat (400-450°F). This intense heat is what will give your pizza crust that characteristic char and crispness. Make sure your grill grates are clean. A quick scrub with a grill brush will prevent your dough from sticking. If you’re using a charcoal grill, you’ll want a good bed of hot coals. For a gas grill, preheat with the lid closed for about 10-15 minutes.
Step-by-Step Cooking Instructions
1. Prepare Your Workstation and Dough: Lightly dust your work surface with flour or cornmeal. This will prevent the dough from sticking as you stretch it. Gently stretch your pizza dough into your desired shape, usually a rough circle or rectangle, about 10-12 inches in diameter. Don’t worry about perfection; a rustic look is part of the charm of grilled pizza. Aim for a thickness of about 1/4 to 1/2 inch. Once stretched, lightly brush both sides of the dough with olive oil. This helps prevent sticking and adds flavor.
2. Grill the First Side of the Dough: Carefully transfer the oiled pizza dough directly onto the preheated grill grates. Close the lid and cook for 2-4 minutes, or until the bottom of the dough is golden brown and has nice grill marks. You’ll likely see some bubbling on the surface. Keep a close eye on it, as grill times can vary depending on your grill’s heat. You want it cooked enough to flip, but not so much that it’s hard to handle.
3. Flip and Sauce the Dough: Using a long spatula or tongs, carefully flip the pizza dough over. Now that the bottom is cooked, you can add your sauce to the grilled side. Spread your pizza sauce evenly over the cooked side, leaving a small border for the crust. Be generous, but not so much that the sauce makes the crust soggy. This is also where you can add a light drizzle of olive oil over the sauce if you like.
4. Add Cheese and Toppings: Sprinkle your shredded mozzarella and grated Parmesan cheese evenly over the sauce. Then, arrange your desired toppings. For best results, precook any vegetables that require longer cooking times, like onions or mushrooms, as the grill time for the pizza is relatively short. Don’t overload your pizza; too many toppings can make the crust soggy and prevent even cooking. Aim for a single layer of ingredients.
5. Finish Cooking on the Grill: Carefully close the grill lid and continue to cook for another 4-7 minutes. The goal is for the cheese to be melted and bubbly, and the crust to be cooked through and slightly charred on the bottom. You can peek under the edge of the pizza with your spatula to check the bottom crust. If you notice any hotspots or areas cooking too quickly, you can rotate the pizza slightly. Once the cheese is perfectly melted and the crust is golden and crisp, it’s ready to come off the grill.
Serving Your Masterpiece
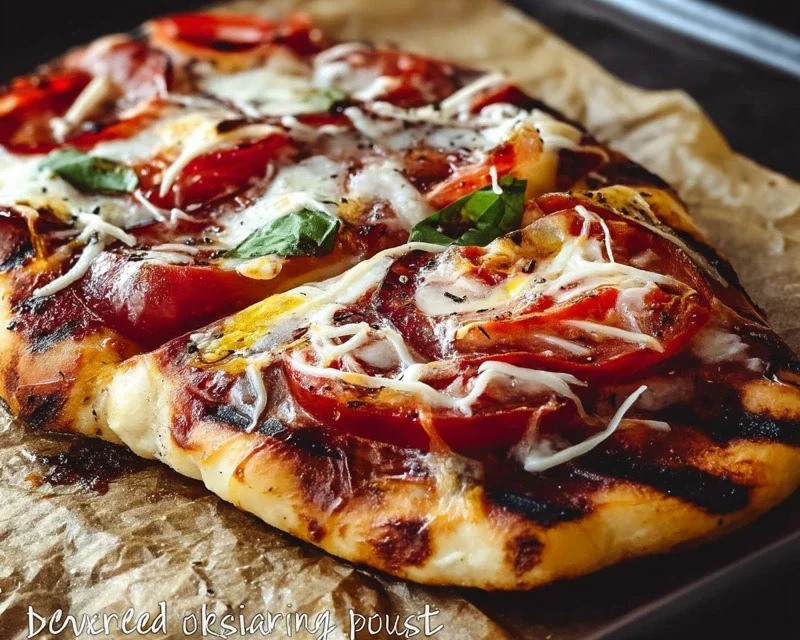
Once your grilled pizza is done, carefully slide it off the grill onto a cutting board. Let it rest for a minute or two before slicing. This allows the cheese to set slightly, making it easier to cut. Garnish with fresh basil leaves if you’re using them. The aroma alone will tell you you’ve created something special. Enjoy the smoky, crispy, cheesy goodness of your homemade grilled pizza! It’s a fun and delicious way to spend an afternoon or evening.
Conclusion:
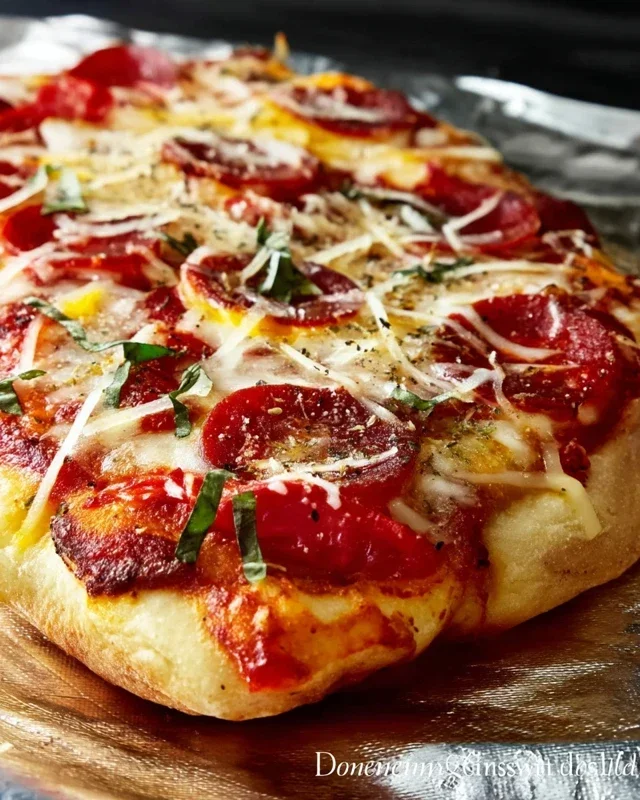
You’ve mastered the art of crafting the perfect grilled pizza, a culinary achievement that will impress friends and family alike! The beauty of this recipe lies in its simplicity and the incredible flavor imparted by the grill. That smoky char, the perfectly crisp crust, and the melted, bubbling toppings create an unparalleled pizza experience. Imagin extracte the delight of pulling your own golden-brown pizza off the grill, its aroma filling the air.
Now that you have the foundation, get creative with your toppings! Consider classic combinations like Margherita with fresh mozzarella, basil, and ripe tomatoes, or venture into bolder territories with spicy beef pepperoni and jalapeños, or even a gourmet white pizza with ricotta, spinach, and garlic. For serving, a fresh, simple green salad with a light vinaigrette is the perfect accompaniment to cut through the richness of the pizza.
Don’t be afraid to experiment! The grill offers a forgiving and exciting canvas for your pizza creations. So go forth, fire up that grill, and enjoy the delicious results. I encourage you to try this recipe and discover your own favorite grilled pizza masterpiece. It’s a rewarding and delicious endeavor.
Frequently Asked Questions:
Why is grilled pizza so much better?
The grill imparts a unique smoky flavor that you can’t achieve in a conventional oven. The intense heat also creates a wonderfully crisp crust with a delightful char, making it incredibly satisfying to eat.
Can I make the dough ahead of time?
Absolutely! Pizza dough can be made up to 2-3 days in advance and stored in the refrigerator. Just let it come to room temperature for about 30-60 minutes before you plan to grill.
What if my pizza dough sticks to the grill?
Ensure your grill grates are very clean and well-oiled. Also, make sure the dough has a light dusting of flour or cornmeal. Cooking the dough for a minute or two on the first side before adding toppings can help prevent sticking.
The Perfect Grilled Pizza
Master the art of grilling pizza for a smoky, crispy crust and perfectly melted toppings. This recipe is designed for outdoor enthusiasts who love a delicious, homemade pie with a hint of char.
Ingredients
-
1 pound pizza dough, store-bought or homemade
-
1/2 cup pizza sauce
-
8 ounces fresh mozzarella cheese, thinly sliced
-
1/4 cup grated Parmesan cheese
-
1 tablespoon olive oil
-
1/2 cup sliced pepperoni (pork substitute for beef)
-
1/4 cup sliced black olives
-
1/4 cup chopped fresh basil
Instructions
-
Step 1
Preheat your grill to medium-high heat. Lightly oil the grill grates to prevent sticking. -
Step 2
Stretch or roll out the pizza dough to your desired thickness and shape. -
Step 3
Lightly brush one side of the dough with olive oil. Carefully place the dough, oiled-side down, onto the preheated grill. Grill for 2-3 minutes, or until the bottom is golden brown and slightly charred. -
Step 4
Flip the dough over using a spatula. Quickly spread the pizza sauce over the grilled side, leaving a small border for the crust. Arrange the mozzarella cheese, Parmesan cheese, pepperoni, and black olives over the sauce. -
Step 5
Close the grill lid and cook for another 5-8 minutes, or until the cheese is melted and bubbly and the crust is cooked through. The exact time will depend on your grill’s heat. -
Step 6
Carefully remove the pizza from the grill. Garnish with fresh basil. Let it cool for a minute before slicing and serving.
Important Information
Nutrition Facts (Per Serving)
It is important to consider this information as approximate and not to use it as definitive health advice.
Allergy Information
Please check ingredients for potential allergens and consult a health professional if in doubt.