Easy Pickled Red Onions- Quick Flavor Boost
Pickled red onions are an absolute game-changer in my kitchen, and I’m thrilled to share how incredibly easy they are to make! If you’re anything like me, you’ve probably encountered these vibrant, jewel-toned beauties as a topping on tacos, avocado toast, or even just scattered over a salad, and wondered, “How do they get so delicious?” Well, prepare to be amazed, because the magic behind these zesty, slightly sweet, and delightfully crunchy morsels is surprisingly simple. What I love most about pickled red onions is their versatility; they instantly elevate any dish from ordinary to extraordinary with a pop of color and a burst of flavor. They possess a unique sweet and tangy profile that cuts through richness and adds a refreshing counterpoint, making them a crowd-pleaser for sure. Forget store-bought versions – the homemade magic of pickled red onions is just a few ingredients and minutes away.
Pickled Red Onions: Your New Culinary Secret Weapon
There are few pantry staples that can elevate a dish quite like a jar of vibrant, tangy pickled red onions. These jewels of flavor are incredibly versatile, adding a welcome punch of acidity and a beautiful pop of color to everything from tacos and sandwiches to salads and charcuterie boards. They’re surprisingly easy to make at home, and once you try them, you’ll wonder how you ever lived without them. Forget those store-bought versions; this homemade recipe is simple, quick, and delivers unparalleled freshness and taste.
The beauty of pickled red onions lies in their simplicity. A few basic ingredients, a little bit of time, and you’ll have a condiment that will transform your everyday meals into something truly special. They strike a perfect balance between sweet, sour, and a touch of savory, with the optional red pepper flakes adding a gentle warmth that complements the onion’s natural pungency.
Ingredients:
Crafting Your Tangy Treasures: The Process
The magic of pickled red onions happens through a quick brining process. We’re essentially softening the onions slightly and infusing them with the sweet and sour brine. It’s a technique that’s been used for centuries to preserve food, but in this case, we’re preserving flavor and creating a delicious condiment.
The key to getting perfectly pickled onions is in how you prepare them and how you pack them into your jar. Don’t rush the slicing, as evenly sliced onions will pickle more uniformly, ensuring a consistent texture and flavor throughout.
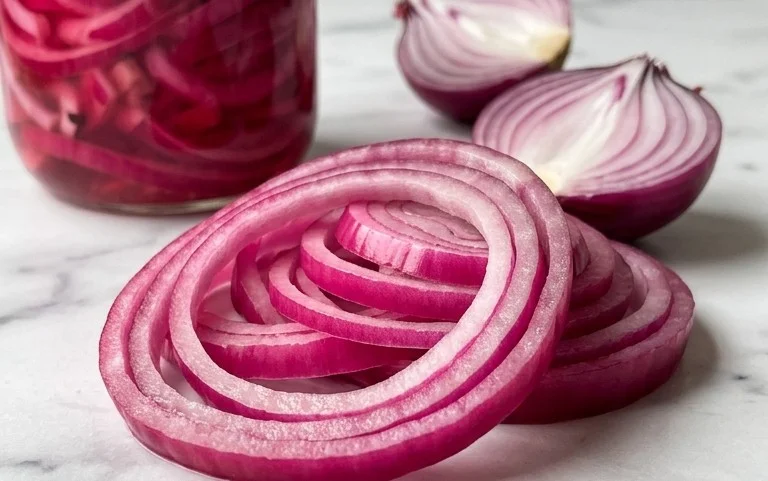
1. Prepare the Onions: Start by peeling your red onions. For the best results, slice them very thinly. A mandoline slicer is your best friend here, as it will give you incredibly uniform slices. If you don’t have one, a sharp knife and a steady hand will do the trick. Aim for slices that are almost translucent. This thinness is crucial for the brine to penetrate them quickly and evenly. Once sliced, you can either leave them as rings or break them apart into smaller pieces, depending on your preference. Some people like the aesthetic of the rings, while others prefer the ease of smaller pieces.
2. Sterilize Your Jar: While not strictly mandatory for a quick pickle that you’ll consume within a few weeks, sterilizing your jar is a good practice if you want to extend their shelf life or ensure the utmost freshness. Wash a clean glass jar (a pint-sized mason jar is perfect for this recipe) and its lid thoroughly with hot, soapy water. You can then sterilize it by boiling it in water for about 10 minutes, or by running it through a hot dishwasher cycle. Make sure the jar is completely dry before you begin extract.
3. Make the Brine: In a small saucepan, combine the water, white vinegar, sugar, and sea salt. If you’re using the red pepper flakes, add them now as well. Place the saucepan over medium heat and stir the mixture until the sugar and salt have completely dissolved. You don’t need to bring the mixture to a rolling boil; a gentle simmer is perfectly fine. The goal is simply to dissolve the solids. Once dissolved, remove the saucepan from the heat. The aroma of the brine will start to become quite pleasant at this stage.
4. Assemble the Pickles: Place your thinly sliced red onions into your prepared, clean jar. Pack them in relatively snugly, but don’t cram them so tightly that they can’t absorb the brine. The brine needs to be able to circulate around the onion slices. Once the onions are in the jar, carefully pour the warm brine over them. Make sure the brine completely covers the onions. You might need to gently shake the jar or use a clean utensil to coax out any air bubbles that may be trapped.
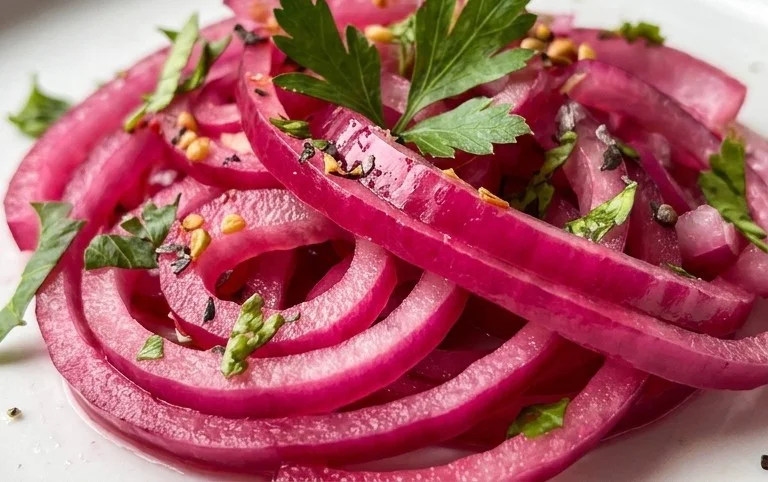
5. The Waiting Game (and the Magic): Now comes the most important part: patience! Let the jar sit on your counter at room temperature for at least 30 minutes to an hour. During this time, you’ll witness a beautiful transformation. The onions will begin extract to soften and turn a more vibrant, almost fuchsia color as they absorb the acidic brine. This initial resting period allows them to start pickling and developing their characteristic flavor and texture.
Storage and Enjoyment
After the initial resting period at room temperature, you’ll want to seal the jar tightly with its lid and transfer it to the refrigerator. The onions will continue to pickle and develop their flavor over time. While they are technically safe to eat after an hour of pickling, I find they are at their absolute best after at least 24 hours in the fridge. The longer they sit, the more the flavors meld and the onions become more tender and infused. They’ll keep in the refrigerator for several weeks, making them a fantastic make-ahead condiment.
Notes on Sugar:
The type of sugar you use can subtly influence the flavor. While granulated white sugar is the most common and neutral, you can experiment with others. Brown sugar will impart a slightly deeper, molasses-like note, and coconut sugar can offer a caramel undertone. The amount of sugar can also be adjusted to your preference, but this ratio provides a good balance of sweet and tart.
Enjoy your homemade pickled red onions on avocado toast, as a topping for burgers, mixed into a potato salad, or simply straight from the jar! They are a testament to how simple ingredients can create something truly remarkable.
Conclusion:
There you have it! Crafting your own delicious pickled red onions is incredibly straightforward and the rewards are immense. This recipe is fantastic because it transforms humble red onions into vibrant, tangy, and slightly sweet jewels that elevate a surprising number of dishes. They add a beautiful pop of color and a delightful crunch, cutting through richness and adding brightness. I truly encourage you to give this easy recipe a try; you’ll be amazed at how quickly they become a staple in your kitchen.
From topping tacos and burgers to jazzing up salads, avocado toast, or even a simple grilled cheese, the serving possibilities for these pickled red onions are endless. Don’t be afraid to experiment! You can adjust the sweetness by adding a touch more sugar or honey, or infuse them with extra flavor by adding peppercorns, bay leaves, or even a sprig of dill to the brine. Once you’ve mastered this basic recipe, the world of pickled red onions is your oyster!
Frequently Asked Questions:
How long do pickled red onions last?
Properly stored in an airtight container in the refrigerator, these pickled red onions can last for up to 2-3 weeks. The acidity of the brine acts as a preservative, keeping them fresh and delicious. Be sure to always use a clean spoon when retrieving them from the jar to avoid introducing any contaminants.
Can I use a different type of onion?
While red onions are ideal for their color and slightly sweeter flavor profile that complements the pickling brine beautifully, you can technically use other onions like white or yellow. However, they won’t achieve the same vibrant pink hue and the flavor might be a bit sharper. For the best visual and taste experience, stick to red onions.
What if I don’t have apple cider vinegar?
If apple cider vinegar isn’t available, you can substitute it with white vinegar or red grape juice vinegar. The flavor will be slightly different, but the pickling process will still be effective. Apple cider vinegar provides a nice balance of tang and subtle fruitiness that I personally love in my pickled red onions.
Quick Pickled Red Onions
Tangy and vibrant pickled red onions, perfect for sandwiches, tacos, salads, and more. Ready in under an hour.
Ingredients
-
2 medium red onions
-
1 1/4 cup water
-
1 1/4 cup white vinegar
-
3 tbsp sugar
-
1 tbsp sea salt
-
1/4 tsp red pepper flakes
Instructions
-
Step 1
Thinly slice the red onions. -
Step 2
In a saucepan, combine water, white vinegar, sugar, and sea salt. -
Step 3
Heat the mixture over medium heat, stirring until the sugar and salt are dissolved. Do not boil. -
Step 4
Remove from heat and stir in red pepper flakes, if using. -
Step 5
Place the sliced onions in a heatproof jar or container. -
Step 6
Pour the hot brine over the onions, ensuring they are fully submerged. -
Step 7
Let cool to room temperature, then cover and refrigerate for at least 30 minutes before serving. They can be stored for up to 2 weeks.
Important Information
Nutrition Facts (Per Serving)
It is important to consider this information as approximate and not to use it as definitive health advice.
Allergy Information
Please check ingredients for potential allergens and consult a health professional if in doubt.